Flash : Dramatic lighting in daylight

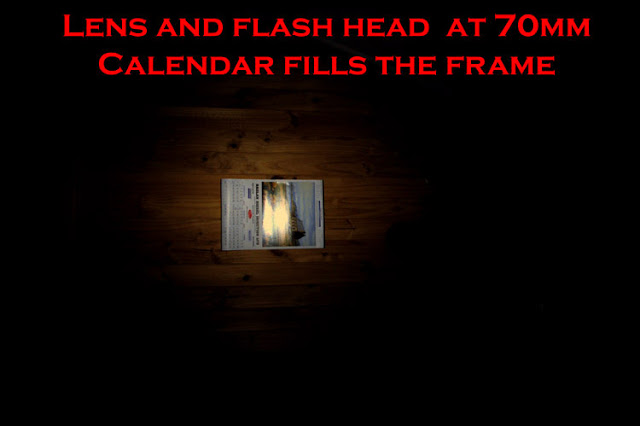
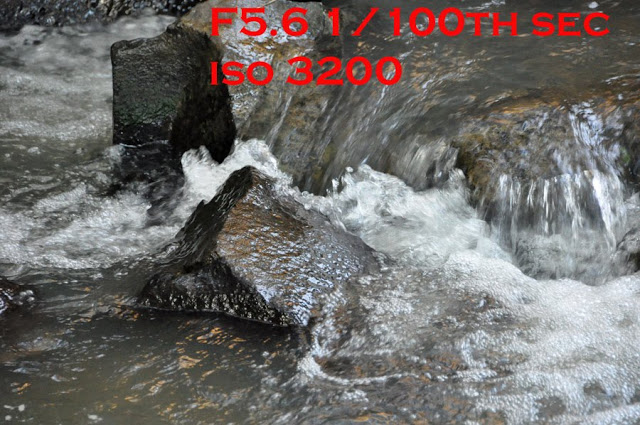
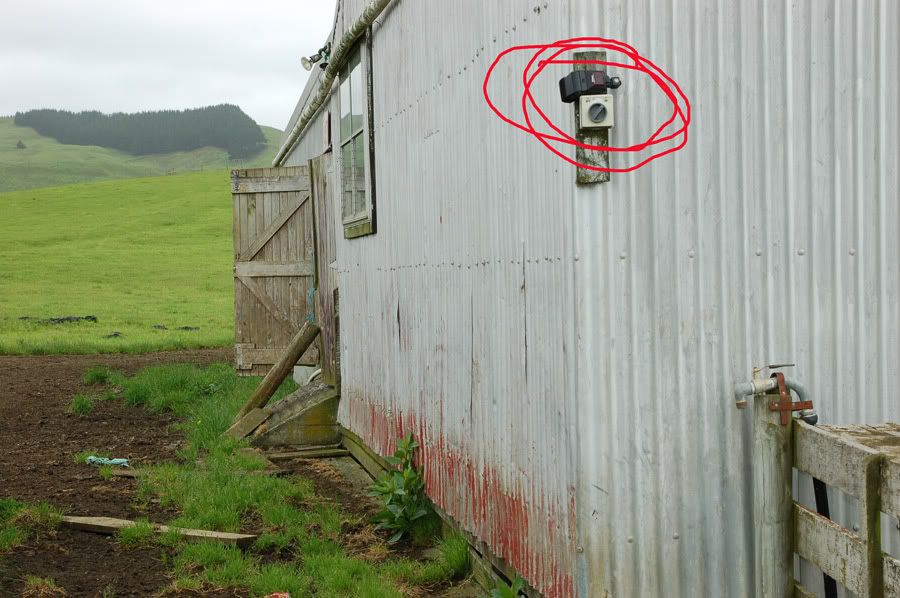
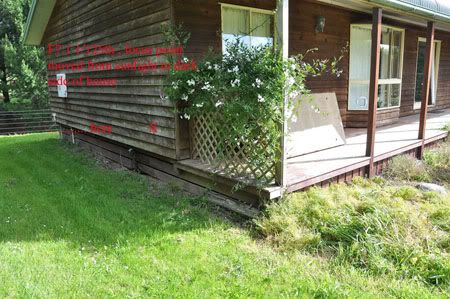
Today I did some tests to see what working distance I could get outdoors during the day with one flash and an under-exposed background .
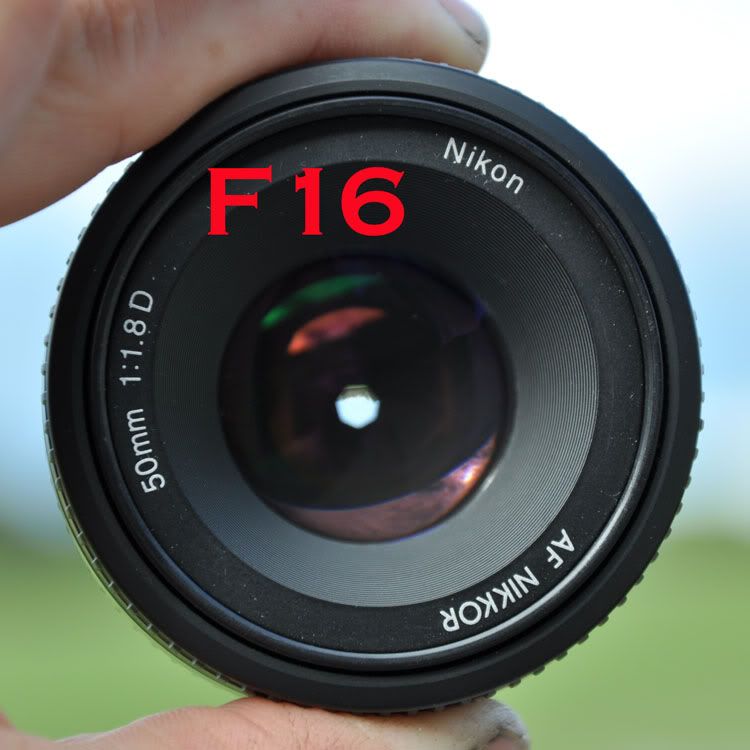
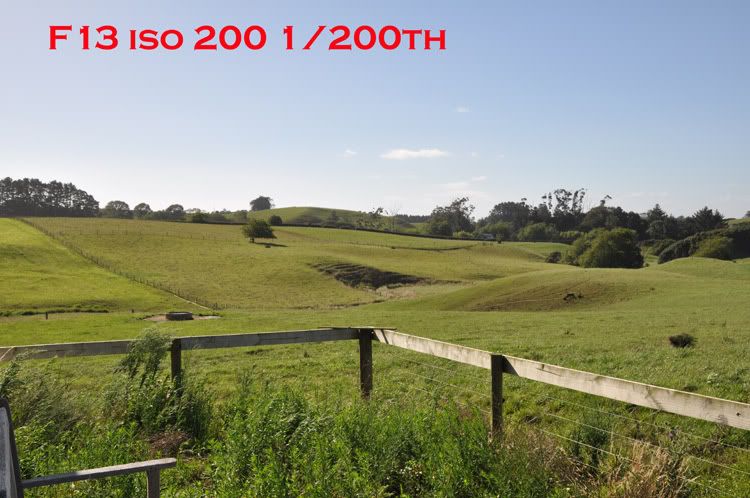
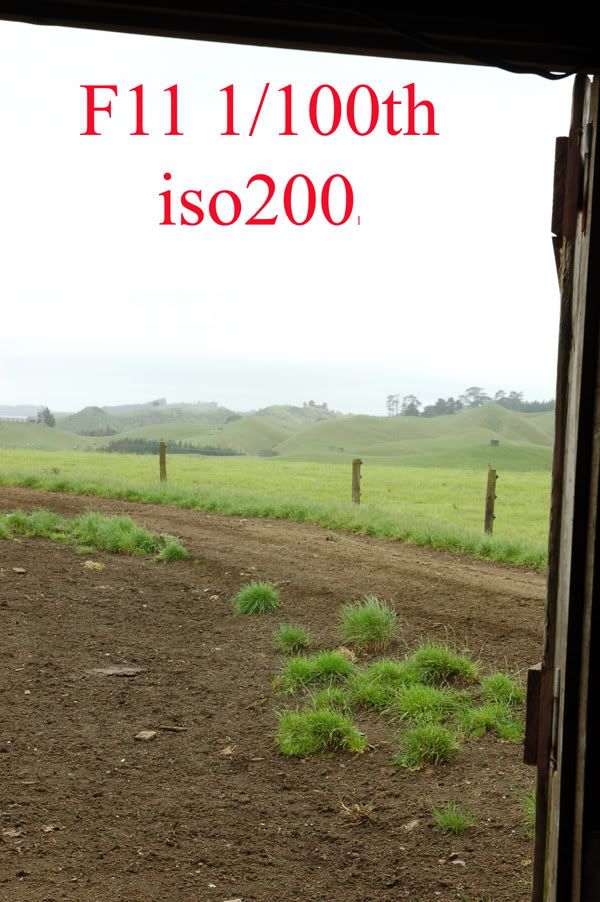
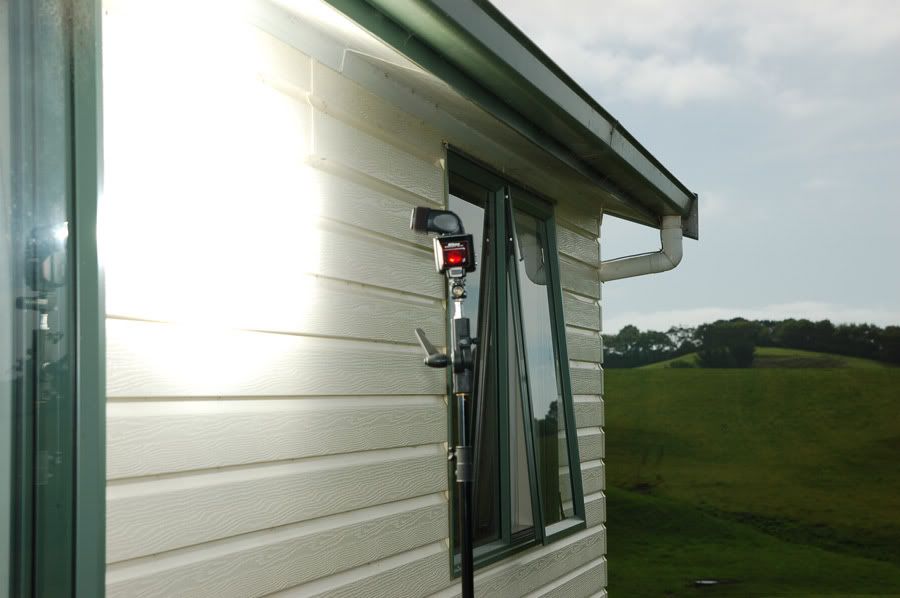
I set the camera up in manual mode and metered the lighting at iso 200 , 1/200th and F16 . Occasionally the meter jumped to show that I needed F18 but that was due to the bright cloud .


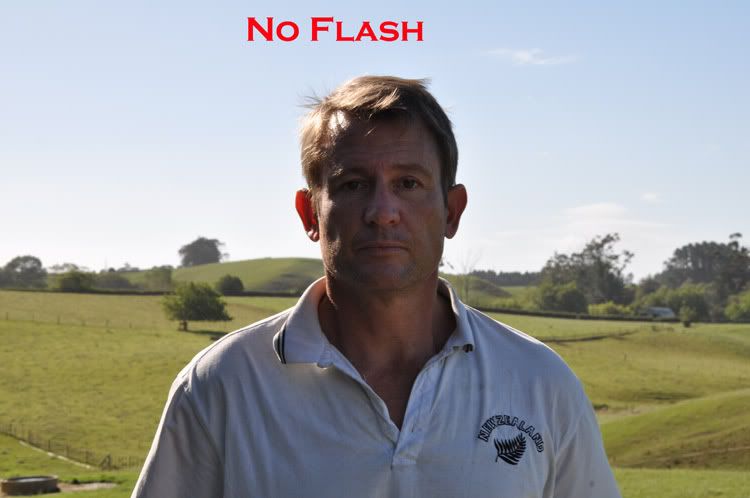
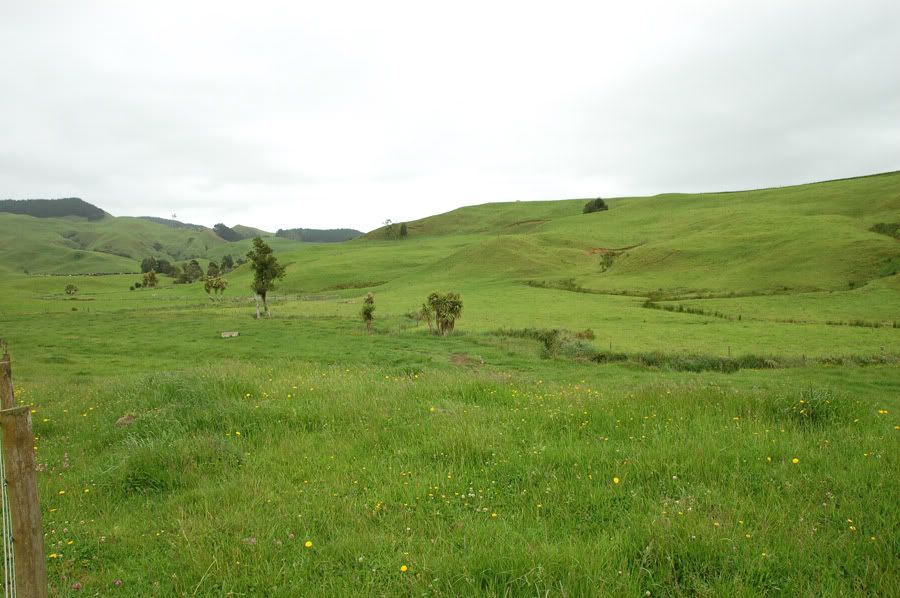
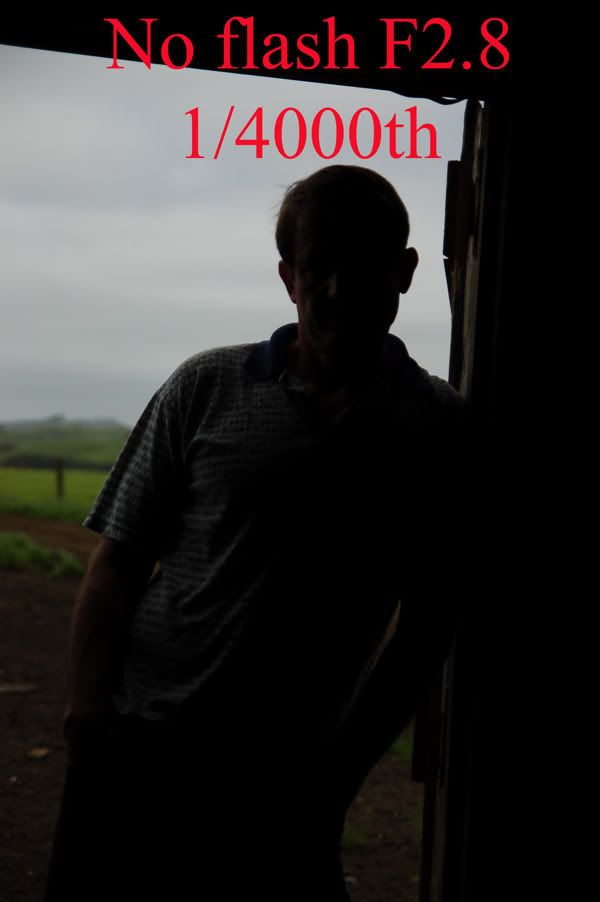
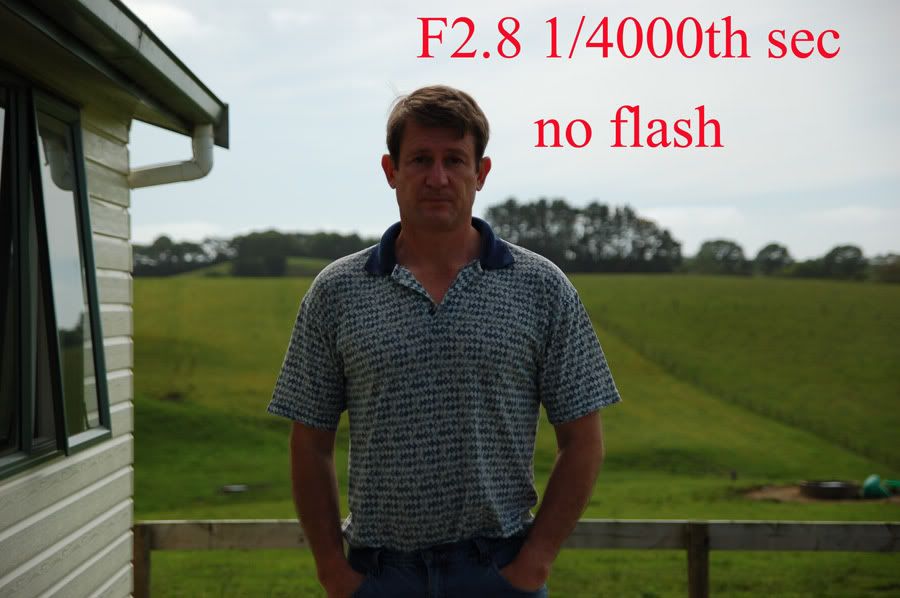
And of course with me standing in the shade this is what it looks like without flash .


[ It has been pointed out that there is a difference in the background exposure - this is due to the clouds moving and the sun appearing occasionally , these things are never simple :) ]

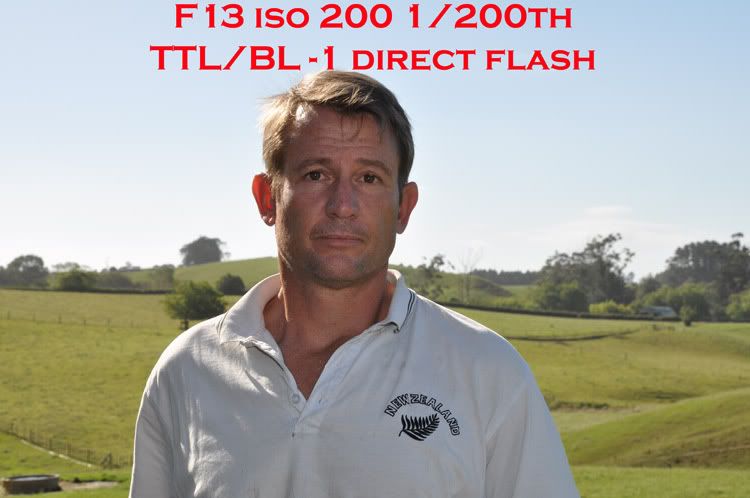
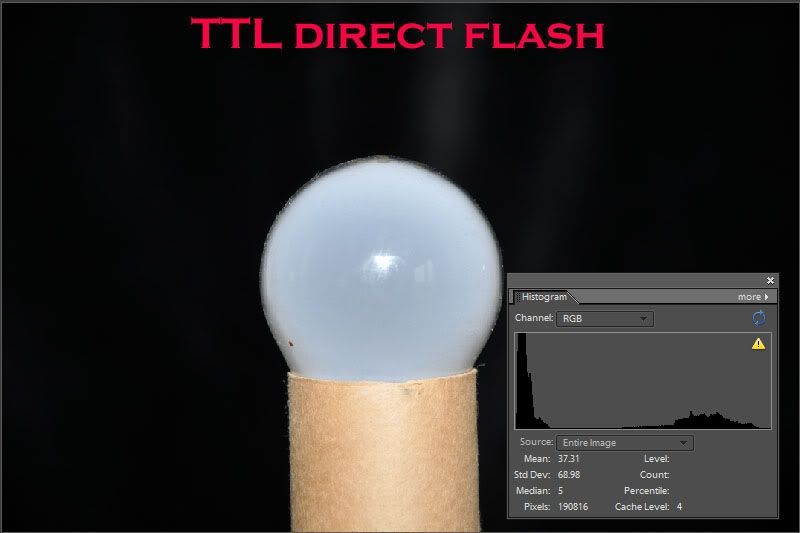
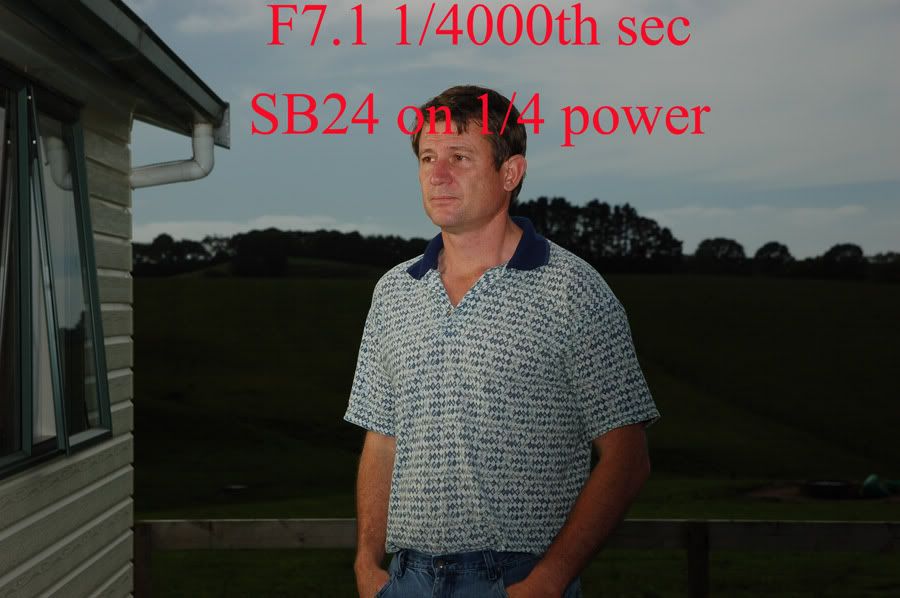
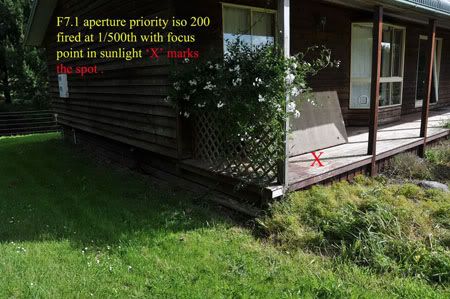
Then we add direct flash .


And then I added the diffuser dome ....


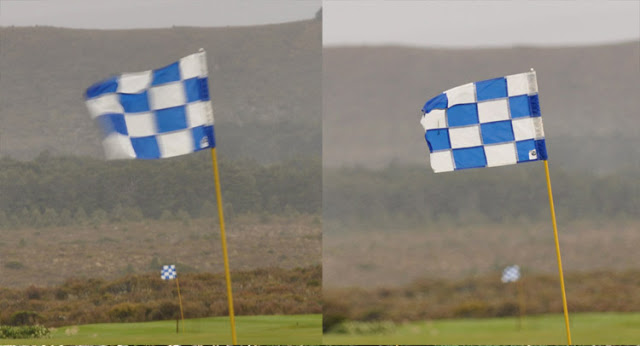
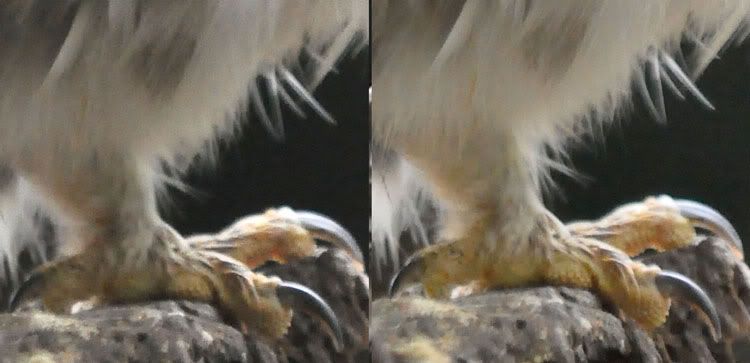
There is very little difference with direct flash and the diffuser dome - the face of the dome is the same size as the flash head and provides the same amount of diffusion outdoors besides wasting a lot of energy on nothing by firing the flash at a much wider angle than the lens is taking in .


I haven't yet seen a logical reason to use the diffuser dome outdoors - all it does is waste power without adding anything to the picture .
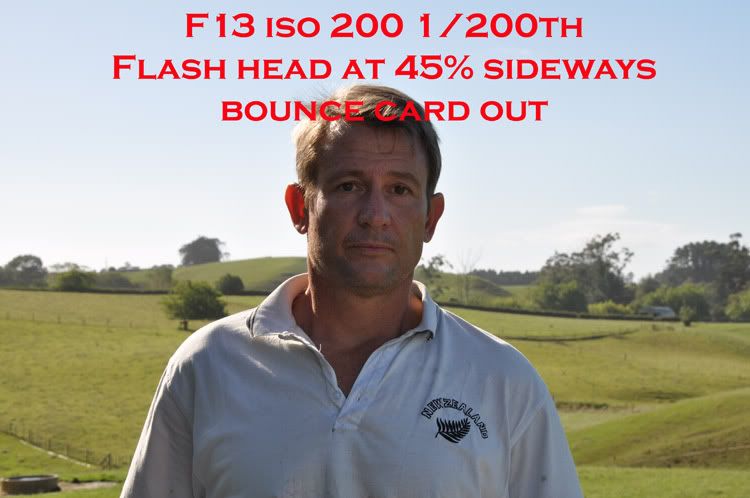
I also tried a few shots with my large bounce card at an angle and realistically all it does is shift the angle of the flash a bit to the side and waste power . If you are close enough to the subject this change in angle can look quite dramatic but for practical photography it makes very little difference .


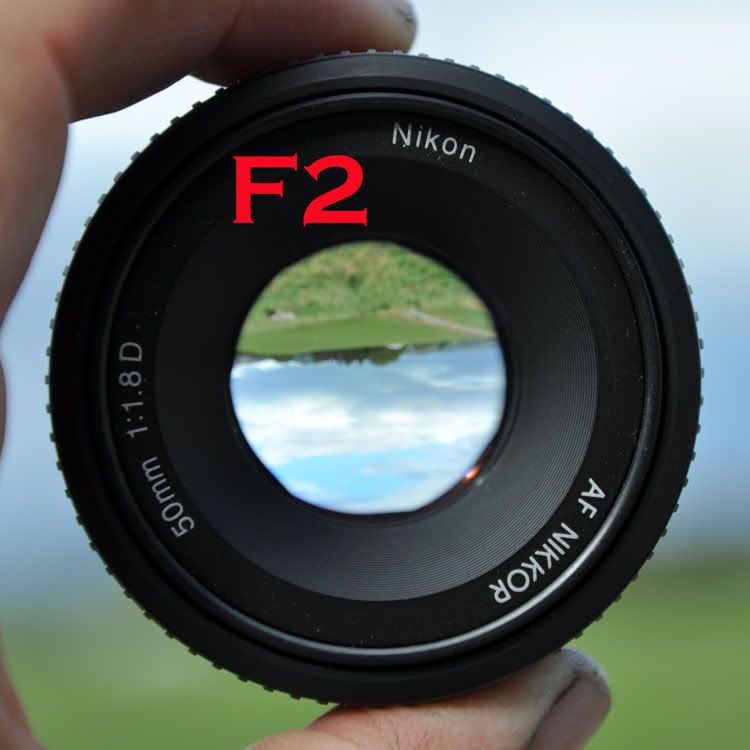
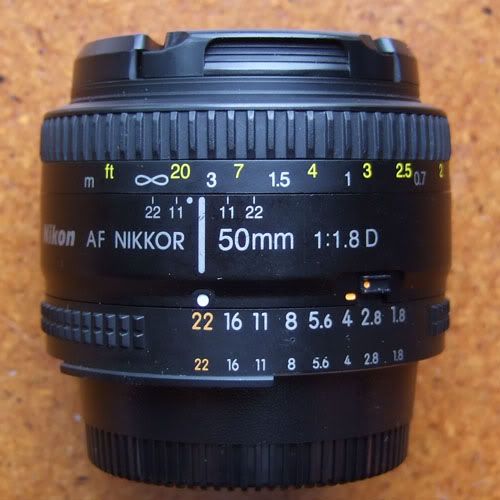
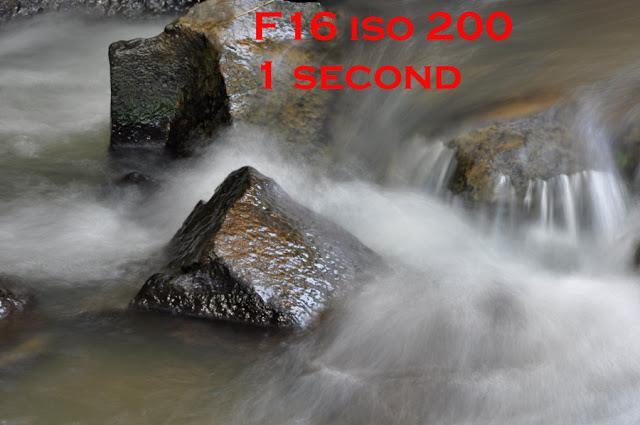
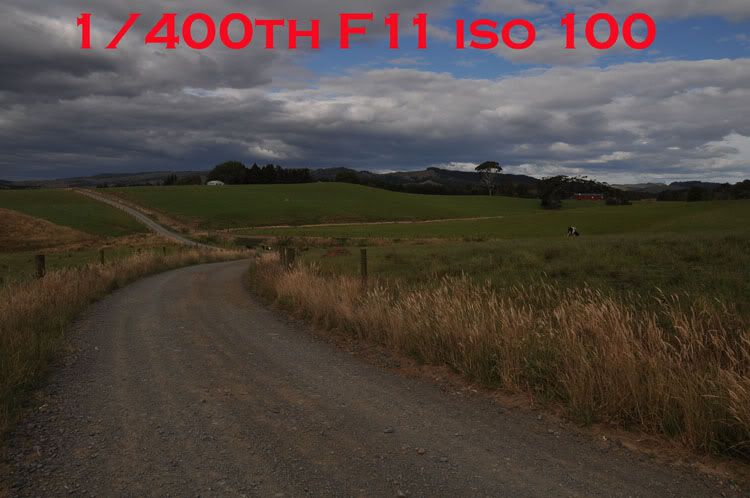
Now on to the 'dramatic' aspect of the experiment . Some people will dial in "-1.7" on the ambient [ any light that isn't flash ] exposure to make the background darker and the subject stand out . I was in manual mode and dialed in an aperture of F29 which showed me "-1.7" on the exposure scale of my meter .


Now at the aperture of F16 the flash was already telling me I had about 4 m working distance at best . By dialing in -1.7 I am also making it harder for the flash - smaller apertures mean it needs more power to get the same amount of exposure on the subject . [ A smaller aperture lets in much less light - ambient or flash - and so while darkening the background also requires more flash power for the subject ] .
At F29 the flash head was telling me I had 2.2 metres working distance at 50mm and 0.8 metres with the diffuser dome on . Since we are under-exposing the ambient by so much the flash will need to light the subject on its own so we aren't just using 'fill-flash' here . 
If we only have 0.8m with the diffuser dome on then tilting the flash head and using the bounce card would waste more power and render that approach useless basically .
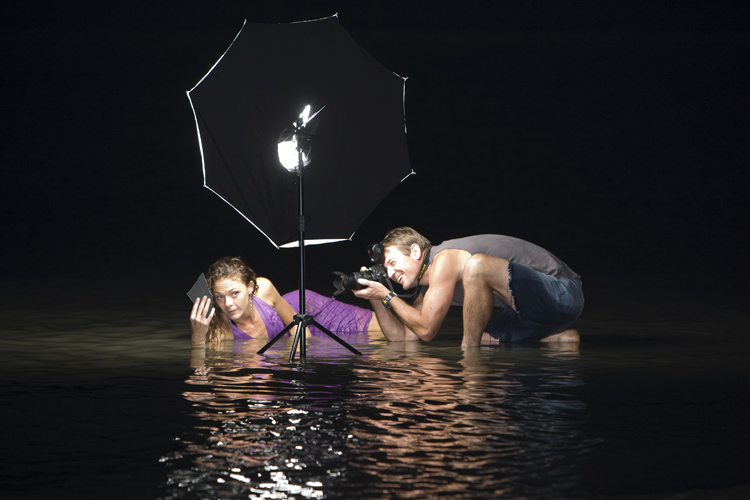
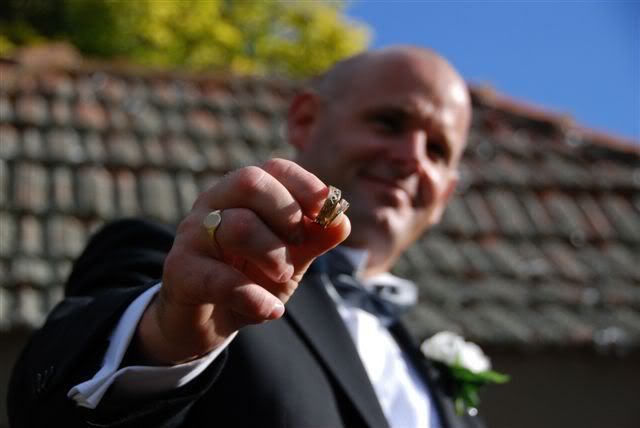
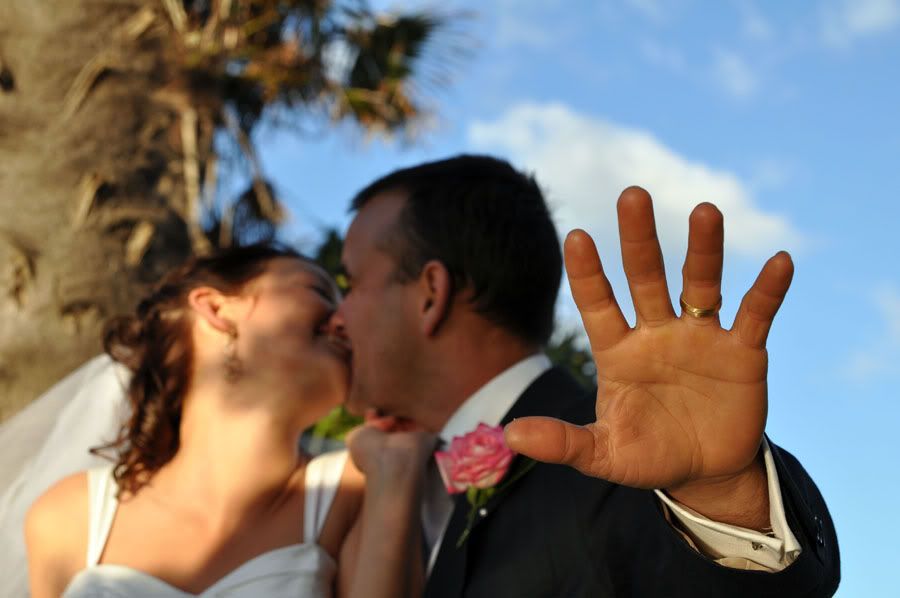
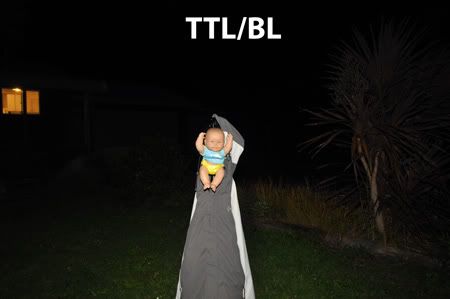
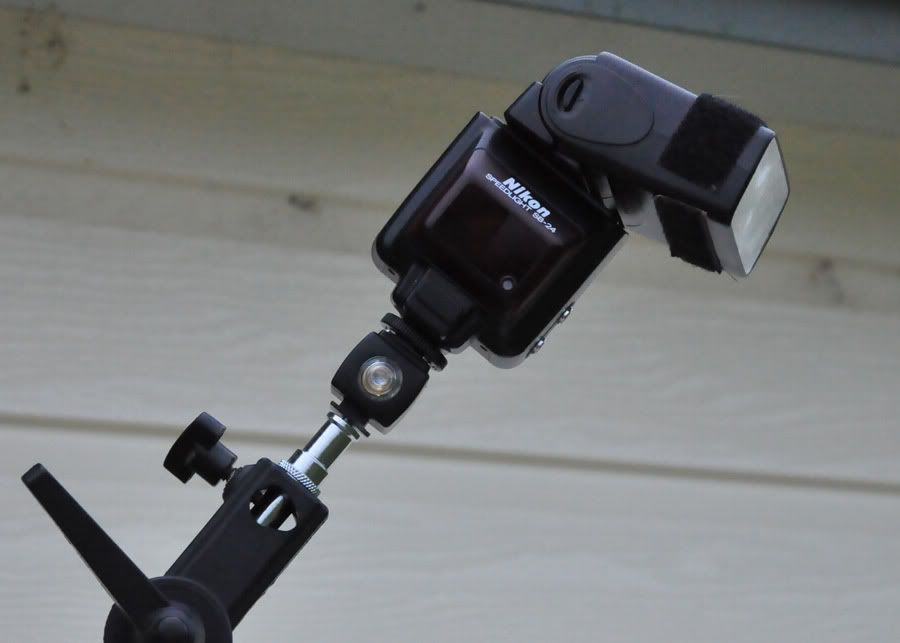
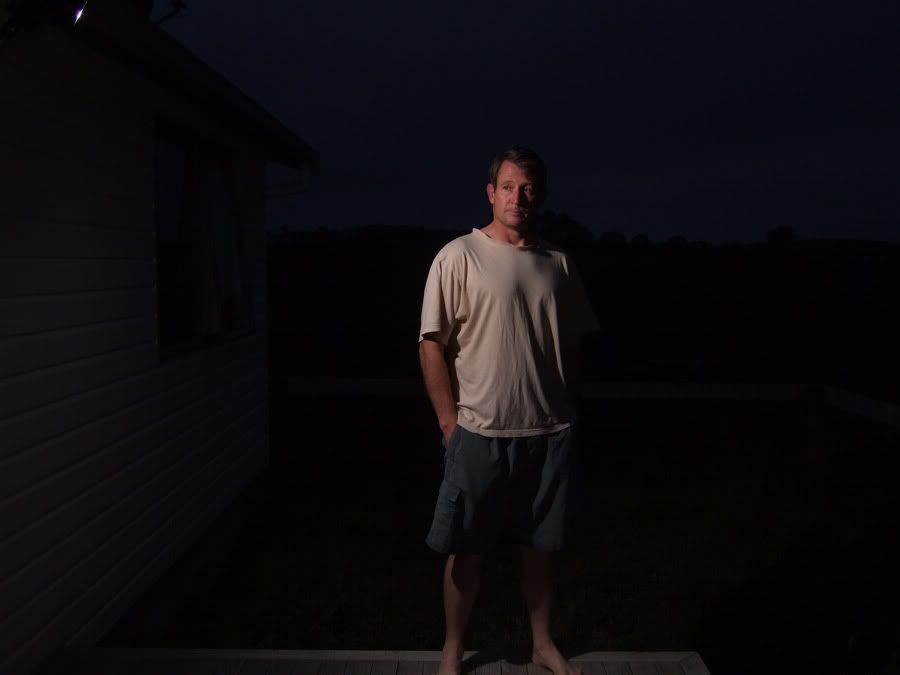
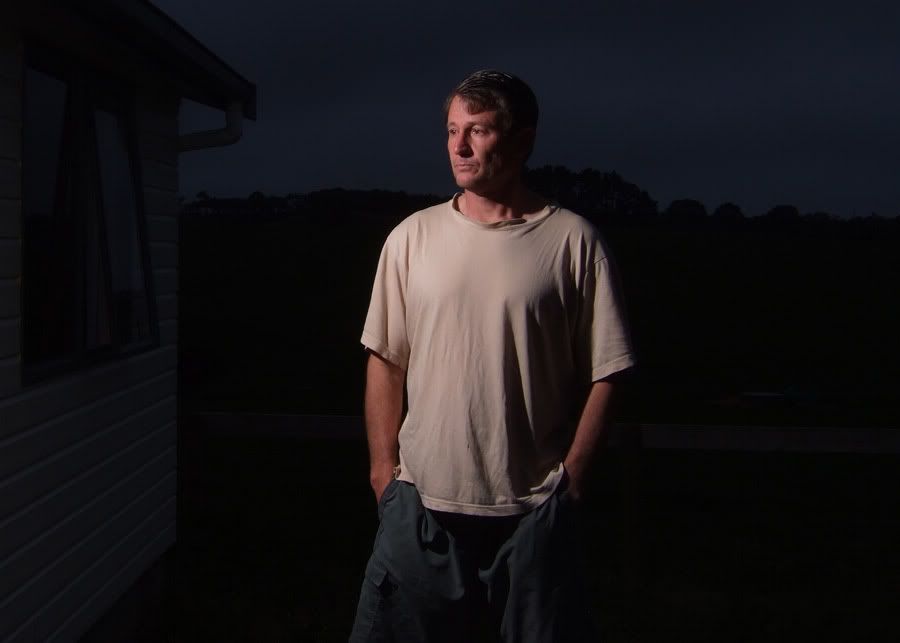
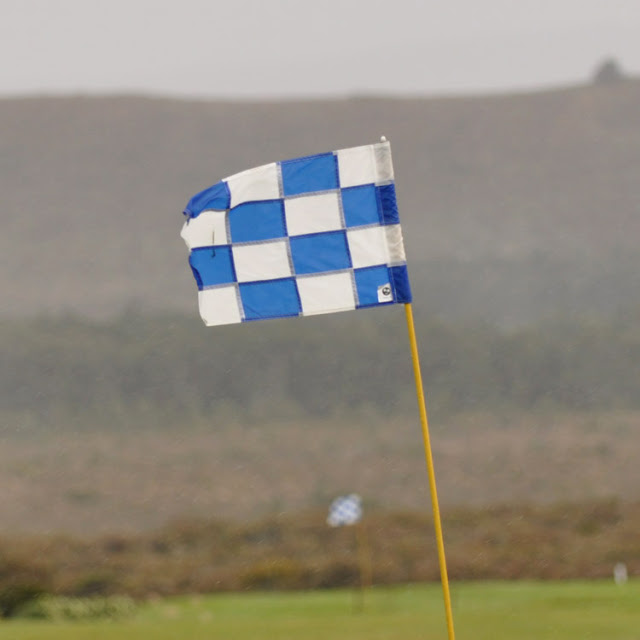
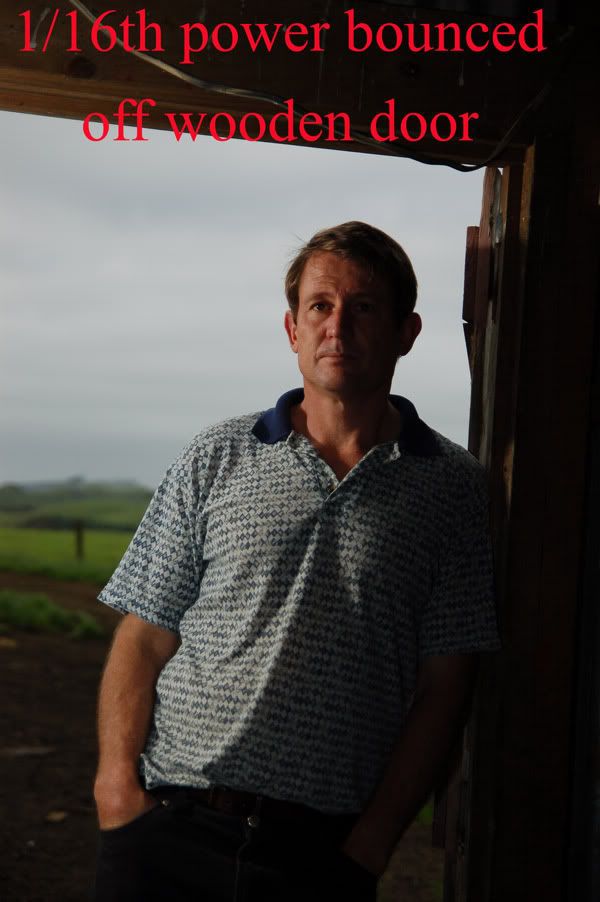
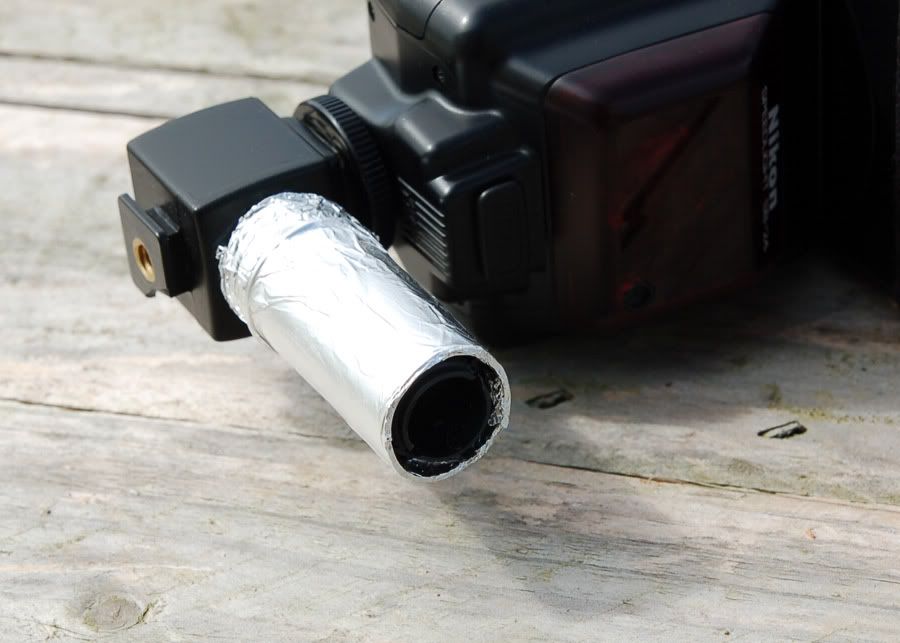
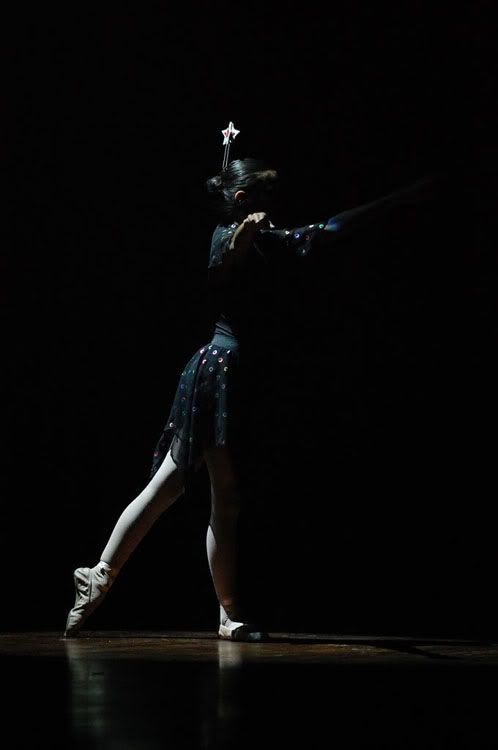
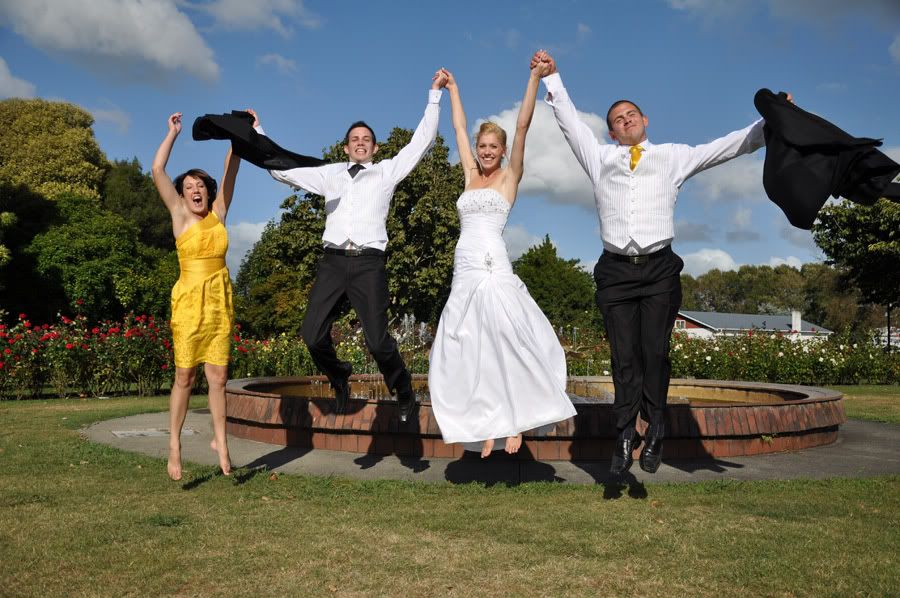
I went to plan-B and took the flash off the camera using an SC-17 flash cord .


This was held in one hand facing directly at the subject and provides the very different look of off-camera flash along with the dramatic side lighting and dark background which makes the picture look very different to the first picture with flash .
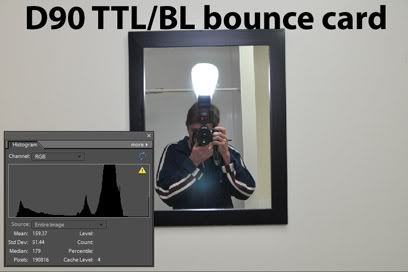
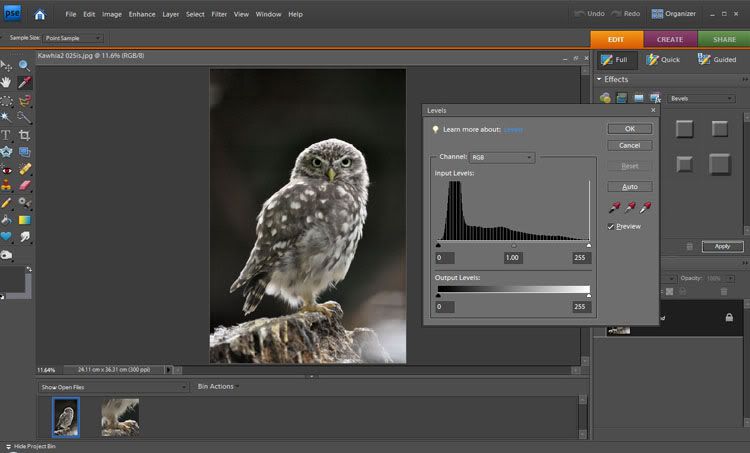
 These images are all straight out of the camera with no processing or adjustments to the flash [ TTL/BL mode ] and obviously could look better with some adjustments and a prettier subject !

We are saving a lot of power with direct flash and hence maintaining our working distance compared to diffusers . We would need more flash power if we wanted to diffuse the light as well - or darker ambient lighting - then we could open the aperture up a bit more to help the flash . Late afternoon or dusk would provide ideal conditions to be able to have a dark sky and a wide enough aperture for the flash to be strong enough to also be diffused for even more professional results . The resulting image demonstrates hard lighting which gives a more dramatic image than soft lighting.


-->

Wedding photography poses

[ work in progress ]
I decided to keep a list of wedding poses as much for my own use as to help others . I'm going to store a few here so I can go through them before the occasional wedding I do and invite others to add to them .
I'm not saying they are great - just trying to make a list of examples to think of before shooting my next wedding .

1.) Lying on the couch/bench .

 
2.) The 'jump shot ' [ for the couples that are into this type of thing ]


3.) The ''human bouquet ''


4.) Multi walking image


5.) Sunset with side flash


5.) Ring shots

 6.) Standing in the road .


7.) Veil over face


 8.) Flying V


9.) Titanic


10.) Rings


12.) Bright backlight


13.) Look for reflections ....


14.) Hand in front of camera .


Nikon TTL/BL 'mapped metering ' update

Taken from my TTL/BL blog


Disclaimer : This theory is made up based on my studies of TTL/BL and is not information from Nikon themselves .... but I still think it may be the truth .

This may be the most simple fact of TTL/BL - or just my wild speculation , but the easiest way to understand the fact that TTL/BL has a similar consistency to matrix metering is to think of it as the same program in that it can 'map out' its subject based on colour information [and the pre-flash reading] .
How can TTL/BL have greater consistency regardless of subject size unless it is totally independent of subject size ?
I'll start off with a simple subject with a dark background .


Whether we have the subject under-exposed or correctly exposed TTL sees this : The area it meters off - end of story .
TTL/BL sees the subject based on the matrix metering pattern which is what gives it the edge with reflective subjects [ more on that later ] .

TTL needs to get an average gray in the centre of the frame and fires stronger when the subject does not fill the frame ....


to get this result .. [ average filter applied to centre of frame ]
 
TTL/BL on the other hand fires a pre-flash [ as does TTL ] and 'maps out ' its subject based on the reading it receives ....
 

 It uses the 'focus point diamond' to determine where its subject is and 'maps it out' rather than relying on it being a certain size .
And gives  a much better exposure ....

Then we move the subject off-centre and see what TTL does to get an average gray in the centre of the frame ....


TTL flash still only sees the centre of the frame and has to totally over-expose the subject to get its average gray in the centre circle ...


Now here's how I define TTL/BL metering , if the subject is off centre it is still using the focus point diamond to 'find' its subject and 'map it out ' and so maintains consistency with its output .


 When it did its pre-flash it mapped out the subject using the matrix metering pattern and was not fooled by the off-centre subject [ which is why you don't need to use 'fv-lock' with TTL/BL ] .


 Here's another two samples with the subject below the centre of the frame .... TTL :


 TTL/BL :


I can think of no possible scenario where TTL will beat TTL/BL with direct flash [ which you would mostly use outdoors ] . In brighter light [ with the ambient closer to correct exposure ] TTL/BL will back off accordingly while TTL will fire at exactly the same power it has here .

On to the 'reflections' ... This is just theory based on some 'borrowed' information from the Canon E-TTL system . The Nikon manual mentions that TTL/BL is good for reflective surfaces but doesn't explain why . Obviously we can't simply assume that Canon and Nikon flash works the same way but much of  E-TTL appears to work the same as TTL/BL and it is a useful explanation with regard to E-TTL which mentions that " E-TTL II examines all evaluative metering zones both before and after the E-TTL preflash goes off. Those areas with relatively small changes in brightness are then weighted for flash metering. This is done to avoid the common E-TTL problem of highly reflective materials causing specular highlights in a flash-illuminated image and throwing off the flash metering. ". As mentioned we can't 'assume' that TTL/BL and E-TTL work exactly the same way but it's a highly likely possibility .


If it does work the same way then my understanding of this is that TTL/BL can analyze the matrix metering pattern before the flash fires ....
 
And then when it fires the pre-flash it can trace out the subject and pick up the reflections and reject them from the metering equation ...


This may also be why TTL/BL doesn't work when you switch to spot metering . It needs the whole pattern to be active to do its calculations . Changing to spot metering 'switches off' the rest of the metering pattern and so TTL/BL can't do its calculations unless you are in centre weighted or matrix metering - because then the whole pattern is available for its use .


Exposure : Explained by Damian of Nikongear.com

I learned to photograph a long time ago using a completely manual camera. It taught me a great deal but I yearned for some automation to help me photograph fast-changing situations. Now our cameras can be so completely automated its tempting to never leave the comfort of those settings, but sometimes I yearn for control so I can be creative and not chained to the software settings chosen years ago in Japan.


I'm presuming you're reading this because you're interested in venturing out from under the auto umbrella. This post is what I regard as the very foundation of successful photography - Exposure - a word that gets used to describe the amount of light we allow the camera to capture.


1: Why does it matter?


Summary


Very simply, if we allow the camera to capture too much light, then the whole picture is white. If we dont allow the camera to capture enough light, then the whole picture is black.


A Bit More Detail


You might be thinking, well whats the big deal, my eyes get it right in all sorts of different places? You would, however, be missing quite how marvelous the eye is.


On a bright sunny day, outside in the sun at the equator, the light is streaming down and bouncing joyously around, higgledy piggledy. If I measured light in bananas[1], then there might be 100,000 of them on such a day.


On a very dark day, like the sort of sullen apology for a day we get here in England in Manchester in the middle of January, there might only 100 bananas. Thats a thousand times less light and yet apart from feeling a bit grumpy with everyone, we barely notice. Some might argue that Manchester just does that to people anyway.


If we went out on a moonlit night, there is only one tenth of a banana. For sure we notice that's darker than the day but on the whole we have no problem getting about in it. The other day I drove a car at 70 mph on a deserted motorway (highway) by moonlight alone  just because I could. It's a thousand times less than our miserable Manchester midwinter morning and a million times less than the bright sunny day with which we started.


A millionfold variation in light levels is a bit much to ask of our cameras. In any case, you may also have noticed that in morose Manchester you can still see white paper and dark shadows just like you can in the sun, so clearly our mind or eyes (or both) is making something a thousand times darker (the piece of paper in Mizzogville) still appear white, just like it does in the sun.


So you can see that actually it is something of a big deal. A good camera can capture, in a single image, something like a thousandfold difference between something very light and something very dark. If we set the camera to capture our 100,000 bananas in the equatorial sun as fully bright, then we took it to Mank City it would only see darkness.


All this means we need a way to control the amount of light coming into the camera.


2: How Do We Do It In Theory?


Summary


In summary we've got the size of the hole (aperture) and the length of time it's open (shutter speed), and they are both defined in such a way that the familiar definitions give us something where a bigger number means less light. One thing that is very convenient is that one step (stop) of aperture changes things the same amount as one step (halving or doubling) in shutter speed, so we can to some extent dance between them.


Most modern cameras are capable of working in one-third steps, so in fact there are two finer choices available between, say, 1/250th and 1/125th, but that's a bit of a detail and doesnt really change the fundamentals.


A Bit more Detail


The camera is a light-gathering device. It captures the constant rain of light[2] in a bucket, then measures how much light in the bucket and writes it to an electronic file. Actually its a lot of little buckets to give you lots of points of information to define the picture. If we let too much light in then all the buckets are full and the file is completely white. If we don't let enough light in then there just some tiny splashes in the bottom of the buckets and the file is more or less completely dark.


Getting control is not very complicated, we have a hole and a cover over the hole. We can control the size of the hole and control for how long we uncover it.


The size of the hole doesn't sound grand enough, so we are inclined to call it aperture because it makes us feel better. Its also sometimes referred to as an f-stop, often with a flamboyant long f. Its not time to get mired in details about why its called that or where it comes from  you dont really need to know that unless you are going to design lenses.


The really irritating thing for me about f-stops is that a little number means a big hole and a big number means a little hole. Whose idea of a good idea was that?


 A big hole, also known as f-stop 2 or just f2


A little hole, also known as f16


f-stops go in a non-obvious progression, evidence of true genius at work, with twice the area of hole being signalled by (drum roll) a factor of the square root of 2. Dont worry, because you don't really need to know about it. If you're an apologist you might point out that a doubling of the area means an increase of 2 in diameter. I don't care, theres no excuse for having such an inaccessible set of numbers that I'm supposed to use when I'm cold, wet and tired. Anyway, enough of my grumbling.


There is a pattern of numbers which used to be engraved on lenses in the good old days, but is now displayed in an LCD panel[3]. This pattern goes something like:


1.4 2 2.8 4 5.6 8 11 16 22 32


Your camera and/or lens might not have all those numbers but it will probably have some recognizable subset of them.


Each of these intervals is equal in terms of the change it makes, and each is known as 1 stop or 1 f-stop. I tell you this so you can uncover the next bluffer who crosses your path, rather than so you can memorise it - I won't be testing you on it. As I got cross about earlier, a bigger number means a smaller hole. Although it doesn't look very obvious, you soon get used to counting clicks on your camera as you set these numbers, so it doesn't actually matter if the sequence makes no sense to you.


The other primary control - I'll come onto what I mean by that in a minute - is how long we uncover the hole for. This is referred to as shutter speed. Yet again we want to work with steps that halve or double the amount of light in order to get control of exposure.


Yet again, some genius of terminology decided that working with ordinary numbers is too easy[4] and so the numbers on your camera are the bottom line of a fraction, giving you the time in seconds your shutter is open. So when your camera says 250 it actually means the shutter is open for 1/250th of a second. If you want more light, you need it open for longer. Is that 125 on the dial or 500? Yeah, see what I mean about the genius bit? It's 125 on the dial, because that means 1/125th of a second, which is 2/250ths of a second. This notation gets a bit inconvenient if you hold the shutter open for a very long time, if youre using a tripod for example, so the camera will add double quotes after the number if it is in whole seconds - thus 2 means half a second and 2" means 2 seconds.


In summary we've got aperture and shutter speed and they are both defined in such a way that the familiar definitions give us something where a bigger number means less light. One thing that is very convenient is that one stop of aperture changes things the same amount as one step (halving or doubling) in shutter speed, so we can to some extent dance between them.


Most modern cameras are capable of working in one-third steps, so in fact there are two finer choices available between, say, 1/250th and 1/125th, but thats a bit of a detail and doesnt really change the fundamentals.


3: How Do We Do It In Practice?


To take complete control of the camera, set in Manual mode. This is probably marked as M and details of how to do it for your camera are in the instruction book that came with it - it's difficult for me to describe it for every possible camera. You're looking for something marked mode, or possibly PSAM, or on Canon cameras PTVAVM.


When you look through the camera and half press the release button, you will see some sort of meter display in the viewfinder. It normally consists of a group of vertical or horizontal ticks, with 0 in the middle and going from +2 to -2. These numbers are the same as one move on the aperture scale or a halving or doubling of shutter speed and are referred to as stops. A 1-stop difference is a halving or doubling of the amount of light the camera collects.


Basically what you do is twiddle with aperture and/or shutter speed until the meter reads 0, and then you have about the right amount of light for the scene. If the meter reads low, keep reducing the aperture and/or shutter speed numbers (remember that smaller numbers mean more light) until it arrives at the middle (bear in mind if you are way off, the meter will be just stuck at +2 or -2 until you get somewhere close).


Trust the theory and it will get you there  bigger numbers, less light, smaller numbers, more light.


4: That Sounds Too Easy?


Well, yes. There are a couple of wrinkles you may encounter.


The first and most obvious one is that some of the choices the camera will let you make might well be bad for your pictures. It isn't your mother and it wont stop you from doing things that might turn out unhelpful. In the days of film, if you didn't know this, you wasted a lot of film. Ask me how I know.


The Big One


The big one is that the hole is open for so long that you can't hold the camera still to get a sharp picture.


Typically, the hole is open for a really short period of time and so it's no problem, but if you make the hole very small and there isn't much light, you will find the hole needs to stay open for longer and longer. If you don't know the focal length[5] of your lens, then try and keep the shutter speed number above 60 (or below 1/60th of a second if you prefer to think of it that way). If you do know the focal length of your lens, try and keep the shutter speed number above the focal length. So if you have a 200 mm lens, try not to go lower than about 250 on the display or 1/250th of a second[6].


If you are indoors then you might find you are at the lowest aperture number (sometimes referred to as the "widest", or even more confusingly the "biggest") and your shutter speed is nowhere near high enough. When I was a boy that meant you either got out a flash gun, loaded some fast film or just put the camera down. These days, professional cameras like the Nikon D3S can take perfectly acceptable pictures in light in which it is difficult to read unaided and so there is no need to resort to mood-ruining flash.


The key to this is rate at which the camera counts bananas[7], often referred to as the ISO setting.


On one of our really bright days, we count bananas 100 at a time. If there are less than a thousand bananas reflected from something then it looks black in the picture and if we get 100,000 bananas it looks white. In Miserable Manchester meanwhile, we count bananas 0.1 at a time. 100 bananas looks white and 0.1 - one tenth - of a banana or less looks black.


The rate at which we count bananas is the ISO setting. "ISO" stands for International Standards Organisation and so ISO is a shorthand for ISO 12232, a standard procedure for defining banana-counting rate in digital photography. As you can see, there are at least 12231 other standards which cover everything from the colour-fastness of toilet paper to the requirement for a condom to stretch 600%. Im not making up either of those. When I was a boy, film speed was referred to as ASA, the American Standards Association, but in this new-fangled global society we've gone all international.


For me, ISO control is a secondary control rather than a primary one. That's all in my mind; in the days of film I could only change it once every 24 or 36 shots and I needed a good level of foresight to have a good range of choice with me; now I can use a different level of ISO on every picture if I want, but I still often think of it as a secondary choice. I just think two things is enough to twiddle


Typically, counting bananas very finely makes for worse pictures than counting them coarsely, for reasons I wont go into right now. Keep the ISO setting as low as possible while not letting the shutter speed number get too small.


The Other One


The other wrinkle is that what the camera thinks is right might not actually be right. When the camera measures the amount of light, it gets referred to as metering - using a light meter to make a measurement.


There have been tremendous advances in camera metering since I was a boy. Nevertheless the camera is looking at what you want to photograph and measuring the light being reflected off it. To get a true measure of the light falling on a scene, we need a different sort of light meter, known as an incident light meter, but your camera hasn't got one. It's not incident in the sense of "The Yangtse Incident" but incident as in "incoming".


So, what the camera has to do is make some sort of presumption about the light coming in. The basic presumption is that across the scene the average level of reflected light is a sort of mid-grey level. A lot of the time that's good enough but if you are photographing a black kitten on coal or a white swan on snow then its not, as it will try to render both of them as mid-grey. You can imagine the poor-old metering gets a bit confused if there's sky in the picture, too, as its not sure whether its the prize-winning lawn in the foreground you want properly exposed or the cutely fluffy cloud in the shape of strange potato you once had as a child.


There was a time when we would agonise over metering and cameras are still equipped with three different styles of metering to try and improve our chances. If we're still unsure we can take several photographs ranging from definitely too light to definitely too dark and hope that one in the middle captures what we want.


For now, in such a basic tutorial as this, I'm going to say use the default metering setting and use the exposure compensation button (often marked +/-) if you don't like how the picture turns out. We can explore the other metering settings another time.


The display on the back of the camera is a bit rubbish for evaluating these things, so I'd recommend using the "histogram" function to see whether or not the picture has light evenly from dark to light. However, I'd counsel against obsessively looking at the histogram after every picture - a practice referred to pejoratively as chimping - and instead I'd suggest taking a sequence from dark to light and then later on look at the histograms to decide which to keep. If you have to do something with the display then I'd encourage you to use "highlight blink", which you can find in the manual. This tells you which parts of the picture are blown - have too much light and have gone white. A few little specks are ok but if large slices of sky are blinking, you might like to take in less light - higher aperture number, higher shutter speed number, or both. Certainly if anyone's face is blinking, the picture is a dud. Suck it up, try
 again.


5: In Conclusion


The bottom line with all of this is practice, practice, practice. Practice in non-critical situations so you get it right when it matters. It's just the size of the hole and the length of time you leave it open for. Thats all you need to know to be an exposure-meister.


Damian Harty .com


[1] Light levels are actually measured in lux. A lux is 1 lumen per square metre. You might not want to know what a lumen is, but if you do then its the total luminous flux emitted into a solid angle of one steradian if a light source emits one candela of luminous intensity uniformly across that angle. I did say you might not want to know and it's not my fault you kept reading.


[2] While I use a "rain of light" as a metaphor, it's not a bad one. Light comes in little drops called photons and the camera really does count photons. Quite quickly, obviously, since it can count to about 4000 in ten million places, three times over in a single second in the case of a D40 and to about 16000 in twelve million places, ten times a second in the case of D3s. That's a lot of counting.


[3] In a lot of cameras there are some intermediate positions between the numbers above, known as half stops if there is one and third stops if there are two.


[4] I'm being unfair in deriding the early pioneers who worked all this stuff out. How were they to know that the worlds population would grow towards 7 billion and that we'd have cameras on our mobile telephones? By the time its become popular the terminology is too embedded to change, so unfortunately you just have to deal with it. But I am sympathetic about how confusing it looks to an outsider.


[5] Don't worry what this means, well get to it in another lesson.


[6] This is an old school rule of thumb and not any sort of hard and fast boundary, just a helpful thing to keep in mind. If your hobby is being an Olympic marksman, you might have quite a steady hand and will laugh at the 1/focal length rule. If you have some sort of nervous affliction you might find it isn't enough. Its just a guide, ok?


[7] I started using bananas as the unit of light just because it doesn't really matter what the units are - see note [1].

Flash : Diffuser dome and "spread" tests

I decided to do some comparisons between normal direct flash , then with the diffuser dome and with the wide angle diffuser .
When I set the lens to 50mm and set iso 200 , 1/200th sec and F11 [ A good 'average' setting for a sunny day with a bit of haze ] the flash tells me I have 5.7m working distance which is actually the maximum distance it could fully light the subject , just as fill flash you could probably double that distance .

This is the flash pattern at 50mm zoom and 1/16th power .


With the diffuser dome fitted the camera tells me I now have 2m working distance which equates to 1/8th of the original flash power actually hitting the subject . This is its pattern .


Then with the wide angle diffuser out we have 2.5m or 1/5th of the original power which is a bit better than the diffuser dome - and this is its pattern .


In my mind it would be better to use the wide diffuser when firing into an umbrella .
With indoor flash you would be working with wider apertures and letting in more light so I suppose the diffuser dome would have its uses there since the light going sideways will add to the exposure when it bounces .
I don't see much use in having the diffuser dome on outdoors since just about everything that hits the subject will be direct light anyway so direct flash when using fill makes more sense to me - and the diffuser dome will use 8X the battery power for the same lighting .


Now have a look at this comparison . This afternoon I decided to see how much of the flash power is wasted outdoors with nothing to bounce off . I fired the flash at 1/500th and F14 with my D50 and the Yongnuo 602 kit mounted on my D90 - the second shot was at F25 .
I had the lens on the test camera fully framing the sideways calendar - anything outside the calendar is wasted flash .
It would appear that making the flash head rectangular has worked out to be counter-productive in that it creates a diamond pattern at a 45 degree angle to the subject !
I would also imagine that by making a reflective 'snoot' around the flash head that bounces this wasted pattern back to the subject we would get a much better diffusion effect than by putting on the diffuser dome which has almost exactly the same area as the flash head itself anyway - I reckon we could also have close to twice the flash power hitting the subject considering how much falls outside the frame .


Flash : bounce card and diffuser tests


I decided to do some tests to see how much light the bounce card and diffuser dome actually throw forward when used .
Partly to also show the futility of only using the bounce card for outdoor flash .


First I took a picture at iso 200 F16 and 1/500th sec [ my D50 can synch flash at 1/500th ] .


Then I took an image with direct flash at 1/128th power .
That gave me a 'pivotal' calculation point , something to compare with .

 
I tilted the flash head upwards and pulled out the bounce card - which also pulls out the wide angle diffuser .
I had to take the flash power to 1/8th to get a similar histogram to the first flash image which tells me that it only throws forward 8/128= 1/16th of the flash or 6% .
But the wide diffuser has a flat edge that also throws forward some light so I tucked that away and tried with only the bounce card out .
I had to go almost all the way to 1/4 power , just a little less , to get the same histogram . here it is at 1/4 power . A bit brighter so somewhere between 1/8th and 1/4 would be right .


This shows that the wide plastic diffuser on the SB800 that pops out with the bounce card throws forward almost as much light as the bounce card itself . Part of this could be due to the fact that since it makes the flash spread more it is directing more light toward the bounce card itself to throw forward .


Then I put the diffuser dome that comes with the flash on , and tilted the flash head at 60 degrees as suggested by the manual and found that I had to only go to 1/16th power to get a similar histogram to the 1/128th power direct flash .
 
128/16 = 8 , 1/8= 12.5 % . 
That suggests to me that the diffuser dome throws forward around 12.5% of the total flash output .
These figures are pretty rough and I'm sure they could be refined a little but I think they give a reasonable idea of the amount of light thrown forward by these flash modifiers .


Professionals make mistakes too !

To make beginners feel better : professionals make mistakes too - but unfortunately sometimes they publish them as well  .
Why do people write photography books ? For the money , not because they want to help people !

{Please note : I am not condemning entire books - just warning about information that could be misleading to a beginner - the rest of the information in the  books mentioned is useful ! }


Many of these people are very knowledgeable about photography but are not necessarily 100% right in all their statements .
As I read through some of the more popular books I see mistakes that could greatly mislead beginners so I thought I would list them here for the benefit of beginners trying to find their way through a sea of [ sometimes incorrect] information .
It's confusing enough as a beginner without reading misleading statements that could further confuse your learning process !


I am busy with this book and on page 18 the author makes the statement about "BL" flash that in this mode " the flash is trying to make the foreground and background roughly equivalent exposure zones " .... that's close to what the manual says which is also ambiguous . Then he goes on to state that if the background is dark it will blow the subject trying to light the background as well  . Nothing could be further from the truth ! In my blog on TTL/BL I explain my tests and how it really works . 

{5/03/2010 :
I've decided to expand on this particular subject since many are questioning my basis for stating that the book's description is totally wrong . The problem lies primarily with Nikon who haven't explained things properly to us .
Page 37 of the SB800 manual describes TTL/BL flash in a very ambiguous way [ I'll go so far as to say the manual is wrong as well in this respect ] ... with regard to TTL/BL "Automatic balanced Fill Flash " it states " The flash output is adjusted for a well balanced exposure of the main subject and background " .... work that one out without getting everyone confused . I started doing tests with TTL/BL flash almost a year ago on Nikoncafe . After many test images [ you can see them on my photobucket album in the "flash" album , most have text on them ] I concluded that TTL/BL only cares about correct exposure on the subject and is far more accurate than TTL flash .
To stick to the subject at hand with TTL/BL it would be more accurate to read : " The flash output level is automatically adjusted for a well balanced exposure of the main subject taking the 'background' or ambient lighting already on it into account " .
As they say "a picture speaks a thousand words "
The author stated that the flash would "arm the photon warhead " and " obliterate the darkness " .. some simple tests will confirm the inaccuracy  of this statement .
To digress slightly TTL flash does this when the subject is smaller than the metering area in the centre of the frame ...


Now we go to TTL/BL , due to the fact that it can 'map out' its subject using the matrix metering pattern - and has the advantage of distance info - it is much more accurate :

 So : Did TTL/BL try to obliterate the darkness ? No , it concentrated on the subject . If anyone still doesn't believe me than all you have to do is try it out for yourself and you will see that the statement that TTL/BL will try to light the background is totally wrong .
 So , Never base your statements on something you have read in a manual or heard from someone else - do your own tests and you will learn so much more .... and never make statements in a book based on what you think the manual means - it will get back to you in the end ! } 


The incorrect statement is due to a rather ambiguous statement in the Nikon manual that has been badly misinterpreted . In reality , the wireless CLS that the author praises so highly uses the same metering mode as TTL/BL  ! BL mode will try to get perfect exposure on the subject " and take the ambient[ background] lighting on the subject into account " - that's the balancing part of it .


On to page 258 " I want the light source to be at least twice as far away as I had it , so that's gonna mean twice the power " ..... this is totally wrong , due to the inverse square law  twice the distance means 4X the power ! 
This may have been a genuine mistake overlooked by a hasty review before publishing  - but it's going to have a lot of beginners believing the wrong thing . I can understand a hastily written website that can be changed but there is little excuse for not checking the info that will be released in a book with no chance to change it later .

Update : 8/04/2010 . I've finished reading the other book from this author and was rather disturbed at his statements about telling people anything they want to hear to get the job and achieve success . 
I don't agree with lying to get what you want and at that ''moment it clicked'' ...... how much of a book ' written to make money' can you believe from an author who advocates lying to achieve success ???


The other book I was reading recently ....


.... has a suggestion on page 41 about using fill flash outdoors .


I have seriously never seen anything so pointless !
How much of the light in this image do you think is going to go forward  .... maybe 1% of 5% ? You'll have your flash firing at full power every shot just to put catch-lights in the subjects eyes , and those catch-lights will be "L"- shaped .

No wonder we have global warming and professionals complain about burning out flash heads ! 

Please note : I agree that fill flash should be used outdoors ! You will do well to follow the advice to use it .... BUT : wasting flash into the air makes no sense when you can simply dial back direct flash for the same results and use less than 1/100th of the power .
 
This weekend I will do some tests to verify the amount of flash that hits the subject with the bounce card .
With outdoor flash you will have the flash dialed down , your working distance will already be greatly reduced and you will hardly notice direct flash at -3 compensation  when used as fill flash .
Why fire the flash at the moon and only get 0.05% of the flash power hitting the subject ? That's one way to fry a flash and waste battery power .


On to the tests :


To give him the benefit of the doubt I stood 6 feet away , he mentioned 8-10 feet .


Just to make sure we were getting the full potential of the flash I set the flash to manual and full power ....


Pretty dismal isn't it [ not the subject! ]

Then I went to TTL/BL -1 direct flash ...


I won't show the picture of my face 2 feet from the camera but when I put the camera in manual at those settings at 1/128th power it tells me I have 0.6m working distance .... with direct flash that is .
At 0.6m [ 2 feet ] with the flash in the suggested position there is still not enough flash at full power .... this suggests that we are getting less than 1/128th of the power from the sideways light using the suggested setup .
You will use more than 150 X the flash power and flatten your batteries more than 150 X faster using this ' technique ' .
I rest my case ... it's a bad suggestion regardless of who made it .


When I buy a camera I expect everything on it to work .
I expect everything in the manual to be correct .
And when I pay for a book of photography knowledge I expect it to be correct .


If anyone has anything to add to this page please let me know !

Flash : off camera flash with a compact

I set myself a goal to see how much I can do with the least fancy camera , to show that it is not so much the gear you have as understanding the principles . I dug out my 6 meg compact , an optical flash trigger and an old SB24 ...


In all I think it was a good exercise !

The biggest challenge with this compact is getting it to focus properly since there is no manual control for the focus . I have to let it auto focus with the led , set the 10 second self timer and drop the glass when it fires .....


Flash : "Rear curtain" or "Second curtain" flash .

Rear curtain flash can be the hardest mode to understand  but once you understand it , it makes 'normal' flash easier to understand .
First try to think of the camera's shutter as the curtains on a stage . The left curtain is bunched up hard against the left hand side and the right curtain is pulled all the way across to the left as well and is blocking the entire "stage" [ sensor in this case ] .
When we push the shutter release button the right curtain pulls open all the way across to the right [ This would be the 'front' or 'first' curtain ] and exposes the stage [ the sensor ] , and when we have enough light the left curtain [ This would be the 'rear' or 'second' curtain in a camera ] pulls across all the way to the right as well blocking the 'stage' [ sensor ] from any further light . This is similar to the way the shutter in the camera works and why it is called "rear curtain" or "second curtain" flash .
Here's my test image without flash :


And then again with flash :


Now : Flash fires in about 1/700th of a second at full power and at minimum power as fast as 1/40 000th sec [ with the Nikon SB800 ] . So basically the flash is over in a very short time compared to how long the shutter actually stays open  .
To make it easier to comprehend I took some images at 1/500th second and divided that into an imaginary slow motion time-line .
1/100th second is the same as 5/500th of a second - or 5 X 1/500th second . 

This is how much light is captured in 1/5th of 1/100th second :


We need 5X as much light as this for our ambient .
In slow motion the exposure would look like 5 images at 1/500th second .
The difference is that in normal flash mode the flash fires as the first curtain opens but in "rear-curtain" mode the flash fires just before the second curtain closes .... something like this :


So what's the point of using "rear curtain" flash if the exposure is the same ?
It depends what shutter speeds you are using and what you are photographing . In the above examples there is no real difference but if you have a moving subject at slower speeds the difference becomes apparent :
As mentioned normal flash fires at the beginning of the exposure which would have this effect with a moving subject , in this case I dropped a golf ball and took a picture with flash . The flash fired as I pressed the shutter release , the ghost trail under the ball however makes it look wrong - almost like the ball is jumping back into my hand .


Now we switch to "rear curtain" flash and things look more realistic because the flash fires at the end of the action and the ghost trail is behind the subject ! Now it actually looks like the ball is falling down - not jumping up .


Of course you would be using a much more photogenic subject - or even a car driving past with its tail lights blurred behind it , but these images should give you a general idea of how "Rear curtain" flash works .
Please remember that using ' rear curtain ' mode will cause your camera settings to behave a little differently to using normal flash .
When you select this mode the camera assumes that you want to get some blur effects and will not jump to the default flash speed  
[ 1/60th in most cases ] .
It will behave very much like the flash is not turned on and will select whatever shutter speed it deems necessary to capture the ambient exposure . This aspect of rear-curtain flash is the same as 'slow-synch' flash which allows the shutter speed to drop low enough to capture the ambient as well .
This is why it is good to learn to go manual when indoors and using flash - so you can control exactly where you want the settings to be .
Video


Flash information for beginners .

{ Work in progress - more to come !}
Flash is probably the hardest concept of photography for beginners to understand . 
I guarantee when you have finished reading and have understood this article you will know more about flash than many professional photographers because many people who charge for their photography really only know what's necessary to get the results they want , and not much more !


The most important thing to understand about flash is that when you use it you are in fact taking two exposures in one .


There are two basic modes of flash :
1.)  Manual and 
2.) Automatic .


1.) Manual flash is basically where you set the power of the flash anywhere from full power (1/1) to minimum power (1/128th) - in some flashes you are limited to 1/16th as lowest power .
Each step halves the power of the previous output .
1/1 , 1/2 , 1/4 , 1/8 , 1/16 / 1/32 , 1/64 , 1/128 th power . 
Some of the newer flashes allow 1/3 increments between those settings as well .
Manual flash requires the most experience and understanding and is well worth learning but I would suggest having a basic understanding of the auto modes as something to fall back on before attempting an important shoot in manual flash mode .


2 . ) Auto flash . This we'll divide into 3 sub-divisions . 


a.) "A" mode 
b.) "TTL" mode 
c.) "TTL/BL"[Nikon] / "E-TTL" [ Canon ] .


2a.) "A" mode is present mostly on older flashes but some of the higher end modern flashes have "A" mode as an option for those who are used to working with it . Very few people use this option though it does have its uses , particularly with wireless flash when the light isn't firing in the centre of the frame and you would like the flash to measure its output itself .
This mode uses a thyristor control which works through a little 'eye' on the flash itself . The flash measures its own output through this 'eye' and switches the flash output off when it measures the right amount of light .
Since the hole it measures from is at a slightly different level to the camera lens it is better to use normal TTL when the flash is mounted on the camera . 


2b.) TTL flash : "TTL" stands for "Through The Lens" which suggests the main difference to "A" mode : Instead of measuring through the eye on the flash there is communication between the camera and flash  , the flash fires a weak 'pre-flash' which the camera measures "through the lens" and then tells the flash what it 'sees' so the flash knows how much power it needs to fire at for the main flash . I made a video explaining TTL flash to make this easier to understand .
With TTL flash the camera measures through a circle in the centre of the frame and tries to make that area an average gray .
It uses an area like this ...... [edit: cameras have changed with time and the newer cameras use the whole focus point diamond for TTL metering]
 
This means that if the subject does not fill the centre of the frame the flash will have to fire stronger than necessary to get that average gray it wants .... this is the main weakness you need to keep in mind with TTL flash . 
Here's and image taken using TTL flash with a white object in the centre of the frame - because it is reasonably large and very reflective TTL has done an ok job of the exposure .


 And an average of the centre ...


Now we use a wider lens and make the same image smaller in the centre of the frame ... TTL still tries to make the centre of the frame the same average gray and to do this it has to make the smaller image much brighter and blow the highlights .


 And an average of the centre again ..


That's the main weakness of TTL flash that you need to keep in mind especially with direct flash and smaller subjects . Another weakness of TTL flash is that it doesn't know what you are doing with the ambient exposure so you need to dial in exposure compensation to the flash when you have the ambient well exposed . More on that in the 'advanced' section later .


This leads us to the newer auto modes ....  


2c.) TTL/BL and E-TTL . 
In these modes the camera still uses TTL metering to measure the flash output but it can select the area it uses to meter from . 
It does this by using the matrix / pattern metering system mainly near the centre of the frame - or the "focus point diamond "[video] 
and upon sending out a pre-flash it 'finds' the subject based on the pattern it 'sees' from the reflected reading it gets . 


this means it is not fooled so easily by a smaller object .
While TTL flash is trying to get an average gray in the entire centre of the frame .....
 

TTL/BL and E-TTL has the intelligence to 'map out' which is the subject using the pre-flash reading and then meter for that area only !


Besides this advantage another strong point of these new intelligent flash modes is that they can read the distance of the subject [with certain lenses ] and use that in their calculations to determine how much light to put out , according to the distance of the subject , which makes them much more accurate than the old TTL modes .
They lose much of this advantage when the flash head is tilted - a switch in the flash head tells it to forget about using distance info so strongly [ though it still keeps it in mind ] and then it has to rely more on the reflected pre-flash reading .
This brings us to yet another advantage with these newer systems .. because they can select the area they meter off they can also select the areas they don't want to meter off ... such as ? Highly reflective surfaces - the camera can analyze the pattern it sees and decide that very bright highlights are actually highly reflective areas and disregard them from the equation ..... example :
While TTL flash darkens due to the reflections [ while taking an average reading ] ...


TTL/BL [ video ] can determine that the really bright spots are in fact just reflections and disregard them .....


The following is accurate for Nikon TTL/BL but still has to be confirmed in tests with Canon's E-TTL
 Perhaps one of the most significant differences with these new modes is the fact that they are ' watching your meter ' and adjust output depending on how well you have the ambient exposed [video] . This can be affected by the metering mode you choose as shown in the video since the movement of the meter depends very much on the metering mode you have chosen so in some cases flash output can change when you switch from one metering mode to another without even having changed your settings .  
 

{I'll continue to refine this section based on feedback especially from beginners , there is much to learn about flash !}
23/05/2010 , added balancing flash with ambient .


-->

Shutter speed .

Probably the easiest concept for beginners to grasp is shutter speed . If you use a slow shutter speed you can see the results right away - a bit easier than aperture and iso to understand .

Here are two simple images to illustrate the concept of using slower shutter speeds to your advantage .

These golf flags were being blown about by the wind

I took one at 1/800th sec to show what we would normally do to 'freeze' the motion .

I was in "S" [ Tv for Canon ] so I could select the shutter speed and let the camera decide what aperture to use to obtain the same exposure in each image . 

The camera selected F2.8 to let in more light to allow that shutter speed  at iso 200 .Note the shallow depth of field at F2.8 - the back flag is blurred .

Then I took another shot at 1/30th second to allow the motion to be shown . The camera chose an aperture of  F16 to block out more light so that the shutter could stay open longer for the correct exposure at 1/30th and iso 200 . At F16 we have a larger depth of field , the back flag looks more in focus than at f2.8 .

Now the two side by side : Which is 'correct' ? 

It depends what you want to do - show a sharp image of a flag or show the movement caused by the wind !

You can see the side effect of using shutter priority mode and leaving the iso constant . To get a faster speed we have to open the aperture up and lose depth of field - as we slow the shutter speed down and the aperture closes to counteract the extra light being let in the depth of field increases - keep that in mind when using shutter priority mode . 

These two images show one of the most popular uses of a slower shutter speed .

Moving water can look quite 'harsh' at faster shutter speeds .

While a slower shutter speed can make it look more relaxing ...

The moving water has turned into a 'mist' as it blurs with the one second exposure - allowing the same drops to move across the frame quite a distance rather than being frozen in motion .

Read more here

Motion sensor camera remote hack .

These are my plans for modifying a motion sensor to trigger a camera via the remote .


First of all you need to find a motion sensor - of any sort , that either sends a signal or makes a noise . 

The infra red ones seem to work best , the ones with a small hole in them are not so good in bright light - Be careful that you don't buy one with a ''dummy'' infra red screen on the front only to open it and find it is the cheap version with a small hole next to it [ ask me how I know :( ] .
I bought this "passive infra red detector"  which is designed to work with an alarm system as a remote in a different room . 
A door sensor with a chime will do just as well and it should be easy enough to follow the wires to the chime so you know where to pick up a power supply from .


Now you open it up and throw away your receipt because there goes the warranty ..... I saw the "S  + - " and decided that must be the "Switch" output and possibly that little chunk of components is the wireless transmitter to the alarm system .


This is the business end of the wireless output of the motion remote .... apparently .


I tested that "S" wire and when the battery was connected , every time there was movement the red LED came on and I received a 9 volt feed there . I decided that it must be the output wire and so I un-soldered the three terminals , threw it away , and did something very simple ....


I took an earth feed from that "-" sign and since my positive output was 9 volts I fitted a 6 volt "zener" or 'avalanche' diode inline .
You must have the dark 'blocking' side of the diode pointing at the positive feed because if it is the other way you will get almost full voltage going to your remote which will fry it .

Now the remote : They all seem to work with 3 volt batteries so I selected a universal remote [ makes sense ] that will work with any camera ..... el-cheapo $16 ....


And the easiest way to get into the battery contacts was to grind the back away  . [ If you are a perfectionist you could make a 'dummy battery' with insulated surfaces and solder some wires to it so you don't have to destroy the remote ] . You can see the "B+" and " B-" inside the body of the remote .

   
As you grind the plastic wipe the lumps of molten plastic away from the sides and try to maintain your composure when the molten plastic does a 'flash meld' with your skin and your workmates are watching .

Now solder the positive feed to "B+" and the negative feed to "B-" [duh ] ........


Then slide a piece of paper between the contacts - apparently if a zener diode pops it has a dead short across it rather than going open circuit =  fried remote . 


These are the zener diodes I bought - I wasn't sure so I bought a selection of voltages .... 600 for $30 = 5c each . In the local electronics store they are 38c each depending on how many you plan on using of course !


Disclaimer !
I don't know how strong they need to be , 500mw [ half a watt ] has worked for me so far but I don't know if it will be better to get stronger diodes . Maybe an electronics geek can step in and offer some advice - I'm only an auto electrician !

But anyway , my little two way radio is only two watts so maybe this is strong enough .
Since I removed the wireless transmitter from the motion sensor I don't see much problem with the motion sensor not being strong enough - it's probably doing less work than before .

 It is really this simple : [ for how long though ? ]


 I then took the soldering iron and made an 'exit' for the wires so I could close the box again .... one way to stink up the house !


And the finished product ! The crazy thing is that the $9 module comes with a free $10 battery ?
 
Now we go outside with it to try it out . I will find a better clamp to hold down the button for "Nikon" but this did the job for now . 
Set the sensor and remote up , camera on tripod , I set manual focus this time because I was working with one second pulses , and then moved around in front of the sensor ....

  { I would like to make a better holder in the near future }


The principle ? 
When the sensor detects motion it supplies a 9 volt feed to the "S" contact which used to trigger the wireless signal to the alarm [ could be a speaker in a door chime as well ] , that 9 volt feed goes through the 6 volt zener diode which 'wastes' 6 volts and lets through 3 volts to the remote . Since the remote button is being held down it is ready to fire as soon as the battery supply gets a feed . 
 
The motion sensor I bought has an added advantage in that it has a 'test mode ' . If the battery cover is off it sends a one second pulse each time it detects motion which is why I had my camera on manual focus for these tests . When you fit the battery cover a switch is held down which de-activates the sensor for 60 seconds and then after that each time it detects motion it sends a signal for 55 seconds which would give the  possibility of having your camera in auto-focus mode and 5 frames per second [ or whatever your camera can do ] and let it focus and fire away when a subject enters the frame . [ I'm thinking wildlife photography here ] .
BUT : I haven't tested the system at 55 second triggering times , I don't know how much this zener diode can handle - time will tell . There is the option of simply using the power supply to switch a solid state relay interrupting the remote battery supply but that would just about double the costs :) .

For now the one second trigger times will do the job for me , there's a hawk living in the trees nearby , now all I need is one of those possums on the side of the road .........

As mentioned these plans are free to use , I tried setting up 'asdsense' to let advertising sponsor my research but it is taking a long time to happen so there is a donate button at the bottom if you feel that way inclined . Any proceeds will go toward replacing the gear I have destroyed so far and buying more things to hack into for photography [ as with my sound activated flash trigger ]  


I see other possibilities as well . There are "driveway alarms" that consist of two units , one in the house and one outside giving the possibility of having your sensor in one place and your camera quite far way in another place triggered by that remote sensor . Perhaps the remote sensor by the finish line of a race  with a 'snoot' to direct the pickup as to exactly where you want your subject to be when it fires the camera - you would have to calculate the time delay as well since it isn't instant .  
I also see possibilities for weddings where "clicking" and "flash" aren't allowed - a compact in 'museum mode' tucked away somewhere .
These things would cost a lot of time and money to manufacture especially but they're sitting on the shelves for $9 waiting to be modified ! Just be careful what modifications you make :) my old remote didn't like 9 volts !

1/4000th sec wireless flash synch

I must admit I was surprised by the results . I knew the optic trigger was obviously triggered at the speed of light but never knew how long it took for the flash to respond to that trigger . I used some 'special camera gear' , the D50 with its electronic shutter , two SB24's and an optic trigger .

I took a walk on the farm to find some 'different' scenery .


Set up the SB24 on this old shed ....


And the flash wouldn't trigger at more than 30cm away - the ambient was messing with the optic trigger so I went indoors and shot out the door so I could still have some ambient to play with .


I opened the aperture and increased shutter speed to darken the background and give me 1/4000th sec .


After playing around a bit because 1/16th power was too much at F2.8 I eventually bounced the flash off a wooden door to weaken it a bit .


Then I headed home because I could see the cows had the same idea .


The sun was coming out and I wanted to make the optic trigger work outdoors and so I put a tube around it - it still wouldn't work properly until I realized the foil was reflecting too much ambient into the tube so I pushed a black tube into it and this got me 4 metres working distance in sunlight .


I went for 1/4000th again


and eventually struck a happy medium with F7.1 , 1/4000thsec and 1/4 power flash ...


Not 'perfect' results but now I know what my limits are['nt] with off camera flash and the D50 !


Weddings for "soon to be 'ex' " friends

"My cousin was impressed with my pictures of mountains and the cat , now he wants me to photograph his wedding ! I have a professional camera so the results should be good  .... should I buy a flash ? "
That's how many questions start on the forums and they often end with " look , I never asked for a lecture on life . Why are you people so unfriendly , I'm going elsewhere for advice ! ".

Wedding photography is a very serious occupation and there are many professionals out there who are very passionate about couples getting the best memories of their wedding possible - because you only have one go at it .
They have also all experienced or heard of horror stories with regard to messed up or lost wedding photos , broken friendships with the person that made the mess , people being sued to pay for another wedding to get the pictures right this time ..... need I continue ?

So if you ask a question like that you will quite understandably be upset by the pro's going into 'attack mode' telling you not to do it , when that wasn't the question you asked , but they are actually trying to protect you and the couple involved .
Wedding photography is a whole different ball-game in photography and whether you like it or not you will get a lecture in life if you ask 'that question' . If you can't handle the replies you get that probably means you can't handle the stress of wedding photography either .
Many pros work with a lot of rich people and can't comprehend the other 90% of the population [ in various countries ] that can't afford $2500 for wedding photos , so they will tell you not to do it under any circumstances .

Ok , now we've got that out of the way and you are still determined to do it ... you followed the well meant advice on the forums and insisted that they get a professional photographer , they told you they can't afford one and if you don't do it they won't have any pictures . You went back to the forums and were told to force them to borrow money for a pro - so they asked you to lend them the money :(  ........... ok , now you can photograph their wedding but you must be totally sure there is no other way !


1.) My first bit of advice would be to find a second , and even third , photographer who also wants to gain experience [ there are plenty of people out there wanting to have a go at weddings for free just for the experience ] . This will be your insurance - two other people taking pictures at the wedding .

2.) Next , how far away is the wedding ? if it is a few months then learn all you can about your camera and get a flash if you don't have one , ask questions on the forums , post pictures , get advice on how to improve ....... BUT :  Only photograph the wedding in the modes you are used to shooting in !
If you are used to driving an automatic car and want to enter a race in a week don't let anyone talk you into driving a manual because it is 10% faster than an automatic - you can make bigger mistakes in manual if you are not used to it , even though someone who is used to it can get better pictures .
If the wedding is one week away rather shoot the entire wedding in program mode , " P " for "panic" [ But you tell the customers it is "P" for "professional" ! ] , and get 500 average pictures than shoot in manual , get 5 really good pictures - and forget it at those settings and then get 495 really bad pictures because the lighting has changed . 


3.) Never try anything new at a wedding ! You don't do a major hike in the mountains with new boots - you'll get bad blisters , you don't hire two professional cameras you have never used the day of the wedding either .

Don't let someone talk you into hiring professional cameras you don't know how to use - rather shoot the wedding with two entry level cameras you know how to use than mess up with pro cameras just because someone thinks that a solid body will give better results - seriously the Nikon D90 has better image quality than the semi pro D300 and I have seen people suggesting to someone they hire D300's rather than using their D90 .... because they are semi-pro bodies ???? The couple will never know the difference in the pictures [ actually the D90 pictures will be slightly better ] but they will notice if you mess up horribly with a camera that you don't know how to use ! 
Will the stronger body give extra protection or make you over-confident in its ability to withstand knocks ?
Maybe you should also hire a rally car with a roll cage to drive there - even though it uses twice as much fuel and you don't know how to drive it ? It can handle the knocks better than your reliable Toyota .... then again they can still both only do the speed limit and you know how to drive your Toyota so are less likely to crash ! 

I heard a horror story of someone who heard that manual focus can get better pictures - so he tried it at a wedding ....... I was told that 15 of the 900 pictures were actually in focus .

4.) If possible have two of everything , two camera bodies , two lenses , two flashes  , plenty of  backup memory cards - It's like mountaineering, if you expect everything to go wrong  and plan for it you will be pleasantly surprised but if you expect everything to go perfect you will only be disappointed .
Oh yes , take spare clothing as well [ and don't wear bright red undies :( ] Two weddings ago I split my pants and luckily[?] managed to borrow some bulky plastic rain pants from the gardener .


5.) Your primary objective is to capture memories - not to try and impress other photographers ! If a picture doesn't look like it will win a competition then simply don't show it on the forums - but it may well turn out to be the couple's favourite memory of the day .

6 .) Don't obsess about image quality and staying at iso 200 , if the light is bad then a sharp picture at iso 3200 is better than a blurred picture at iso 200 , they'll probably think the noise is artistic anyway . " You can fix noise but you can't fix motion blur " .


7.) Don't feel you need to buy new gear for the wedding . It's a natural reaction when you start to doubt your abilities and think that buying a new lens or camera will fix that . There's nothing wrong with buying gear you have needed for a while but don't let anyone talk you into buying a flash bracket or other item you have never used before - only to find it's not what you expected on the day .
If it's a few months from the wedding fair enough - if you have time to practice with it , but you don't want a second hand lens arriving two days before only to find after-wards that it had a focusing problem which is why it was sold ..... only use what has proven itself in the past !


8.) Added from the comments section below , quote from "Adam" :
As a suggestion I would also consider a contract. Not so much for liability purposes, but to hammer home that "I could stuff this up".
Many people think that you're just been humble when you say you're not a professional and may not get good photo's. When they see a piece of paper - most then then get a revelation that you are serious.
Also - another good reason to have 2 or 3 photographers is that there is no '1' person at fault, when they don't get the same sort of images that "their friends with the pro" got, and you're not the 'bad man' all out on your own.


9.) Organize the group shots to start with the biggest group [everyone together] and whittle it down from there otherwise you will waste a lot of time gathering people together , suggest that right after the ceremony [ depending how it goes ] they all sit/stand still for one group shot before everyone gets carried away hugging and kissing and congratulating the couple .
Try to arrange for the couple to have someone with the list setting the groups up for you .

10.) Take a few shots , at least three , of each group - using a tripod if possible - in case you need to do a head swap if someone blinks a lot , or simply filter through the images and select the one good one. It's much easier to delete a few images later than try to do something with only one group shot where someone's eyes are closed. 
Take more shots for bigger groups where more than one person may be a 'blinking blinker'.

11.) This one is important : Have a plan !
Scout out the location of the ceremony and ''gardens''[?] for the formal pictures . Find at least 4 nice spots where you can plan what you want to do . Write some poses down on a piece of paper .
You can always get some casual shots in between locations but it's very hard to 'make things up ' on the day .
Have a look at my "wedding poses for inspiration" and feel  free to add suggestions there . I keep it mainly to refresh my memory .

12.) When you go hiking in the mountains it's easy to forget that at the end you will have a pile of rubbish that will need to be put somewhere to carry it back .
Well , as you progress through the day you will start to accumulate memory cards that will need to be stored somewhere VERY SAFE . Have an empty pocket or case of some sort where you will put the full memory cards knowing that they are separate from the empty ones .
These memory cards are worth a lot more than a new one in the shop - they could be worth the cost of paying for another wedding if they get lost !

13.) Arrange for rest time during the formals . Once you have the group shots done and take the wedding party off for some formals and fun shots set aside 'rest time ' , tell them that there will be 10 minutes here and there where you will all sit down and recover , check camera settings , look at your notes for inspiration from the poses you have written down and ... rest .
Everyone will be pretty tired by now and will appreciate it.


14.) Don't think of arranging shots after the speeches or reception .... once the couple sit down and start talking with friends and family [ two separate categories ?] they don't want to do anything more - they are tired . Perhaps though , you can talk them into one ''mock cutting of the cake" to get that out of the way before you take a few shots of the dancing and slink off into the shadows ..... 


14. Flash : [ I mean use a flash on your camera !] .
The main concept of good flash is : " Less is more " meaning that you should rather dial down the flash power to make it harder to see flash was used then blow their eyeballs out of their sockets with flash that is too strong . Even in an emergency the built in flash dialed down to "-3" can make an image better by adding catch-lights to their eyes while still making it hard to tell that flash was used .
If you have an external flash then bounce the flash whenever possible , off walls , off the ceiling - anything rather than direct flash . If you are outdoors and there is nothing to bounce off then direct flash is the only way , just dial it back .
Something like "TTL/BL-1" [ ETTLII -1 if you shoot Canon ] in bright sunlight and "-3" in overcast weather ... and everything in between .   


15. So how many images do you hand over ?
many pros will tell you not to hand over more than the best 300 so that other photographers will not be able to pick out mistakes you have made , they also say that more than that is too many for them to look through .
My thoughts are that they have the rest of their lives to go through the images and I don't care what other photographers think about technical issues the couple won't notice , so I hand over as many as there are , deleting only blurs and duplicates and the occasional bad facial expression or blink .
I want to impress the couple not other photographers , and why should I delete their memories ?
At the last wedding I handed over 1500 images and they were delighted especially with a the few that I had thought of deleting because of a persistent 'problem' with the groom's tongue sticking out like a cat .... the bride loved those shots .... if she didn't they could just delete them :)  

16. Details : Don't get 900 pictures of the bride and groom only . When things are moving slowly look around for details that will be a reminder of the day . Get shots of the rings , her shoes , the dress , the table decorations - make them different from normal snapshots .
[ Think you need a fancy camera ? This was taken with the 'old' 6 meg Nikon D50 - the 85mm 1.8 lens was the secret weapon ]


17. Want something 'different' ? Occasionally I do a slide-show so they can see the pictures of the day right at their reception ! Most pros would recoil in horror at the thought of people seeing their un-edited images but nobody notices the mistakes , the screen quality is normally not good enough to show the mistakes anyway and the "Ooooh"s and "Aaaah"s give a good indication of what pictures the people like .


18. Once a bride told me beforehand that she was very self-conscious and doesn't like too much attention directed toward her . I told her that I would have a talk with the groom and if I noticed she was feeling uncomfortable I would joke around with him to direct attention away from her .
I discussed this with him so he knew why I was making jokes with him and he played along quite happily .
Now I do this with every couple - I tell each of them that we will make jokes amongst each other to ease the situation , that way neither gets offended by my weird sense of humour and they feel that I'm doing them a favour when I joke around .

19. Know how to use your camera , don't rely on auto settings that you do not understand . Use only one focus point . At one wedding my second shooter had a fancy new camera with 45 focus points . She left the focus mode on 'multi focus mode' which uses all of the focus points .
There were some pictures of the bridal party in the back of a limo and the one girl closest to the camera was in focus - the rest were out of focus including the bride in the centre of the frame .
The 'multi' focus mode with all 45 focus points active chose the closest focus point and messed up a series of images with an out of focus bride - the main subject supposedly .
Some cameras offer the possibility of using all of the focus points while being able to select which one is 'active' - just be sure you know which focus point the camera will use !


My thoughts on the friendship part is that if my friends can't handle the situation if it goes wrong after being told the risks then I thank them for showing me that they aren't real friends and move on with my life - many others will not feel this way though so it's up to you whether you go ahead with it now or not.

That's all I can think of for now - I'll update this as I think of other advice I can add :)

Auto iso and flash .

Many people think that auto iso stops working as soon as you turn the flash on .
Basically it keeps working , but only for the flash . It stops working for the ambient .
{"Ambient" is basically any light that isn't flash .} .
I set up a few pictures of "Stinky" watching a movie - the computer screens and curtains in the background help to show what happens with the ambient when the flash is turned on .
First of all here's a picture with no flash taken on a tripod at f11 . I chose iso 200 and left auto-iso turned on the whole time . Auto iso went up to 3200 because I had 'minimum shutter speed' set at 1/125th so auto iso went as high as it could before dropping the shutter speed .
Look at the computer screens and the outside light on curtains as the settings change .


Now watch what happens when I add a flash . I used direct flash on the subject to emphasize the changes in the background . Look what happened to the outside light on the curtains and the laptop screen .
Since I had the iso set at 200 the camera was happy to leave it there because now the flash metering has become the priority - it no longer cares about the background - only the subject , and iso 200 was enough for the flash system .

Now we tilt the flash head to get better lighting using bounce flash .


Now when we use bounce flash we are suddenly wasting a lot of energy in all directions to get more natural looking light . The light has to travel much further and it is being diffused in all directions meaning that we need more power to light the subject . Since I chose F11 , when the camera does a pre-flash and gets its reading it realizes that it doesn't have enough power to effectively light the subject and be ready to fire again in a hurry . [ It doesn't necessarily wait till it needs more than full power before making the decision to increase the iso ] .
In this case it decided that iso 200 would not do the job and so it pushed the iso up to 900 - auto-iso does work when you use flash ..... but only for the flash metering .


Now , as a side issue , bounce flash has made the lighting look more natural but there are nasty shadows on the subject's face so we need to get a little forward light as well . We do this by pulling out the bounce card . { a business card held on by a rubber band will do the same job .}
This throws some light forward to light the shadows .


That's better !


Now we have that out of the way what about auto iso when you have chosen a higher iso ?
Just to prove the point , something you may never come up against but is good to know , I set the iso at 1600 and took a direct flash shot of the subject again . Auto iso pulled it back from 1600 to 1000 because at F4.5 and iso 1600 the minimum working distance was 8.3 feet and I was closer than that !


So remember to keep this in mind . When you use flash have a look at the distance info on the back [only if your flash has it of course ] .
When I had the aperture wide [ F4.5 ] and the iso at 1600 with direct flash it told me the maximum working distance was 66 feet . But : Never forget the minimum distance as well ! It is telling me my minimum working distance is 8.3 feet -even  if it fires at its weakest anything closer than 8.3 feet will be too bright ! Always remember to keep your minimum distance in mind !  


So even though it often doesn't look like auto iso is working when we use flash it is still doing its job for the flash metering system . Many people would actually like it to work for the ambient as well so hopefully the manufacturers will do something about it . Using "slow synch" doesn't get auto iso working either - it just makes the camera forget about the lowest speed you set auto-iso to work at and drops to the shutter speed it needs to expose the background correctly no matter how slow it is .

03/2010 : I read a statement recently that the new D300S works somewhat differently and also adjusts iso for the ambient so  perhaps this will be changing in all Nikon's in future ?


Exposure : Described by "blumesan" of 'photocamel'


EXPOSURE:
In photography, exposure is defined as the total amount of light allowed to fall on the photographic medium (film or sensor) during the process of taking a photograph.

Now we have learned that adjusting the size of the aperture and the time of the exposure (the shutter speed) are the basic tools which allow us to control the exposure. However, even if it seems quite obvious, it is worth emphasizing that the primary factor in determining exposure is how much light is illuminating (and being reflected from) the subject we wish to photograph. Aperture and shutter speed are then used to control how much of that light eventually reaches the film or sensor.


I mention this right up front because one will often read that the "exposure" of a photo was, for example, "1/250 sec. at f/8.0". This meager data sometimes confuses beginners. You should be very aware that, without some further information, these numbers, by themselves, don't give any real information about exposure. To convey even a rough approximation of exposure, the information must include, at minimum, some clue to the lighting conditions under which the photo was made. Was it a bright sunny day, a dark cloudy day, or in a closed room illuminated only by candlelight? 


Therefore, when you need to choose a suitable combination of aperture and shutter speed, you must first determine the how much light is available. The old way to do this is by eyeball; perhaps not very precise, but when trained by experience it worked pretty well; (see the entry about the "sunny 16 rule" [at the bottom of that page]). Fortunately the fact that almost every modern camera contains a built-in sensitive instrument to measure the light (commonly called the exposure meter), relieves us of this task. Even better, many cameras made in the past couple of decades contain sophisticated mini-computers which, in conjunction with the exposure meter, will calculate and set the shutter speed or aperture, or both, with no intervention on our part.


If you are content to always let the automated camera make all of the exposure decisions for you, then you probably don't need to read much more of this section. The remainder is written for those who, at minimum, wish to know a bit more about how and why the camera automatically adjusts the exposure the way it does. It will be particularly important to those who want to take an active part in controlling the exposure parameters themselves and need to know what advantages are gained by so doing.


Exposure chosen by camera blew out highlights in the snow  .

 
Adjusting exposure to retain detail looked more true-to-life even though the camera meter registered -1 under-exposure


The first subject that needs to explored in just a bit more detail is aperture. You may have already read that the size of the aperture is designated by a rather strange set of numbers, and that the smaller the number, the larger the aperture. If you are having trouble getting your mind around this curious convention, it will make much more sense if you always think of the aperture number as the denominator of a fraction (the number that is on the bottom of a fraction). So if you are comparing, for example, F4 with F16, think of these values as 1/4 and 1/16. It should then be very clear which is the larger aperture.
Next let's consider the set of values that you might find on the aperture ring of a typical lens. (For those who may have a lens without an aperture ring, stay tuned; we will discuss that later).


2.0 | 2.8 | 4.0 | 5.6 | 8.0 | 11 | 16 | 22


The smallest value on some lenses may be less than or greater than 2.0 (more about that later); and you may run into a few lenses where the largest value is more than 22. 


The most important feature of the above series of values is that each value represents an aperture that is exactly one half the area of the value immediately to its left, and therefore allows exactly one half as much light to reach the sensor. And, although it seems really obvious, to hammer home the point observe that: if you read the series from the right to the left, each value represents an aperture that is double the area of the value immediately to its right. In the jargon of photography moving from one value to the immediately adjacent value is known as a change of "one stop". Said another way, changing the aperture value by one stop means halving or doubling the area, and thus the amount of light allowed to reach the sensor.


Note that throughout the preceeding paragraph I have written the word area in bold face type. I did this to stress the idea that the exposure (the amount of light reaching the sensor) is directly proportional to the area of the aperture rather than the aperture diameter. However the rather curious series of aperture values listed above are computed directly from the diameter. (For those who are interested, the math involved in converting diameter to area results in this unintuitive sequence of values represents a doubling or halving of aperture area.) In any case it's worthwhile to become familiar with this series. If you can remember just the first two values, you can construct the rest of the series by doubling the value two places to the left. (i.e. 2 x 2.0 = 4.0; 2 x 2.8 = 5.6; etc.)


Now, for those with inquiring minds, I want to expand a bit concerning the above series of aperture values. In my collection I have four lenses each of which has, as its initial aperture number, a value less than 2.0. These values are: 1.4, 1.5, 1.7 and 1.8. Only one of these values, 1.4, represents an aperture that is exactly a one stop larger than 2.0, and thus fits the criterion of the series. The other values are a result of the manufacturer producing a lens whose maximum aperture is larger than 2.0, but not twice as large (in area). So if you have such a lens, keep this in mind. The aperture values that follow these odd values are exactly the same as shown in the series above. I have another lens whose initial (lowest) aperture value is 3.5. The next highest value that can be set is 4.0, but there is nowhere near a one stop difference between these two apertures. So, as a general rule going from one aperture value to the next usually represents a one stop change (doubling or halving) of exposure. But like every rule there are exceptions. Fortunately these exceptions, when they occur, are confined to the initial (smallest number) aperture value.


Speaking of exceptions, if you have a modern digital camera where the aperture value is set using a dial or other control built into the camera body and displayed on an LCD panel (as opposed to using a ring on the lens itself), well you can throw this rule out the window. Most such cameras allow you to choose the increment, when going from one aperture value to the next. You may set the camera so that the interval is 1 full stop or 1/2 stop, or 1/3 of a stop. So, if a one stop change doubles or halves the exposure, how much does 1/2 stop change the exposure? That's a tricky question; for now it's enough to know that the change is less than that of a full stop.


Next we discuss the second variable that allows us to control exposure: shutter speed. If you were to examine an older camera, you would find a control dial showing something like the following series of shutter speeds, in fractions of a second:


1/15, 1/30, 1/60, 1/125, 1/250, 1/500 


What you should note is that each value in this series reduces the time the shutter is open by one half, and therefore allows exactly one half as much light to reach the sensor. This corresponds exactly to the series of aperture values listed above. The result of this relationship is particularly convenient when, for example, you know the correct exposure is F8.0 at 1/125 sec, but you wish to use a faster shutter speed (e.g. when subject is in motion). You will achieve exactly the same exposure if you change the shutter speed two steps, to 1/500 sec. and change the aperture two stops in the other direction, to F4.0.


Modern digital cameras control shutter speeds electronically. As a result you will find that one can choose from a much finer spectrum of shutter speeds where the intervals are smaller than a doubling or halving of the adjacent setting. To maintain the convenient correspondence between aperture and shutter speeds, those cameras that allow you to choose the interval between aperture values will automatically set the same size interval between shutter speeds. This means when you increase the shutter speed by two "intervals" you will achieve the same exposure by changing the aperture by two "intervals" in the other direction.


Terminology: I have stated above that the traditional unit for a change in aperture that results in a doubling or halving of exposure was a stop. Very strictly speaking this term was restricted to aperture changes. The traditional unit for a change in either aperture or shutter speed that results in doubling or halving of exposure was a step. However many respected authorities have used both terms interchangeably. Modern terminology, and that used in most camera manuals I have seen, introduced a new term: Exposure Value (EV). The meaning remains the same. A change in EV of one unit denotes a doubling or halving of exposure. Thus your new camera may give you the option of setting the interval between adjacent aperture values, shutter speed values, and also ISO values (to be discussed later) to 1/2 EV or 1/3 EV.


To recap, we have learned that the first variable which affects exposure is the amount of available light. Next we have the aperture and shutter speed which control how much of that light reaches the sensor. There is one additional variable which, while it does not control exposure per. se., it does determine how the sensor responds to light. I am referring to ISO, a value that describes the sensitivity of the sensor. The greater the sensitivity, the less total light needs to reach the sensor to produce a properly exposed photograph. Film is manufactured with a range of ISO values, but once you put a roll of film in the camera you were stuck with that ISO value until you changed film. Digital cameras allow us the luxury of changing the ISO (the sensitivity of the sensor) from one shot to the next. The ability to increase the ISO allows us to get shots where the available light is meager and we have already maxed out the exposure with the aperture and shutter speed controls.


F2.8 , 1/125th sec , iso 1600
Also see "Exposure explained by Damien of nikongear.com "


Histograms and exposure compensation


Learning to use your histogram will prove very useful in getting correct exposure .
This is pretty basic stuff compared to some of the explanations out there but it does the job for me . The histogram provides information for all the colours in a picture but I've chosen to use black and white to make things easier .
Have a look at the following image - what colour is it ?

................................... F5.6 iso 200 1/640th sec ....................................

You know it is white because that's the colour of most manuals but technically it is neutral gray - compare it to the white on the screen . That is what my camera meter chose ! look at the histogram as well - it is in the middle where 'average gray' should be .
The meter tries for an average gray and the camera does not know if the manual was a gray object in good light or a white object in bad light - it aimed for an average tone to be safe .
I was shooting in manual and did what the meter told me . The first picture was taken at 1/640th th of a second and the second one was taken at 1/160th which let in 4 times as much light [ 2 stops : 1/640th-1/320th-1/160th ...]
] and made it look 'whiter' [ . I knew it was white so by increasing exposure by two stops [ 4X as much light ] I made it look more like it should .... it is a bit dirty so we have a 'dirty white' manual rather than a gray manual . If you are shooting in an auto mode you could dial in exposure compensation .... hold down the +/- button by the shutter release button and move the control dial until the screen shows "+2" [ or more/less depending on the actual colour of the scene ] .
...................................F5.6 iso 200 1/160th sec "=+2EV compensation ]...........

Now I'm going to go one step further and let in more light , twice as much actually by shooting at 1/80th sec . At this point It is a bit overdone - the histogram is touching the edge of the display and when I check the 'blinkies' [ '' highlights''] on my display I see some flashing in the centre of the image which means 'white with no detail' . Besides that my 'white' manual doesn't look anywhere near as clean as that ! .
We could play around with settings between 1/160th and 1/80th but I'm happy enough with the image above so we'll go back to 1/160th and leave it at that .
.................... F5.6 iso200 1/80th sec = 3 stops more than 1/640th sec ..............


Now have a look at this image - because there is black and white in the scene the meter has selected a more accurate reading . I have the black object on the left to make it easier to understand the histogram - the left hand side is for dark tones and the right is for light tones - and everything in between . The two arrows show where the histogram ends on each side - the far left of the histogram is for "black with no detail" and the far right is for " white with no detail " so our histogram shows that we have detail in the entire image because we are not touching either side .

Also the left 'mound' is for the dark areas and the right 'mound' is for the light areas .
As a side issue you will notice some bright reflections on the black surface that are actually brighter than the dark areas of the white surface , their information would appear on the right side of the histogram .


Now look what happens to the histogram when I under-expose the image by two stops - I was still in manual , the first image was taken at 1/6th and the second at 1/30th . Look at the left side of the histogram , it is all 'bunched up' showing that there is a lot of detail lost to "black with no detail" .

Now I've taken the exposure in the other direction by keeping the shutter open for longer by exposing for the black side of the image . This gives us a lot of detail in the ["gray looking"] blacks and has totally blown the detail in the white side - the histogram confirms this as it is 'bunched up' against the right side . You could look at this histogram without even seeing the picture itself and know that you have a lot of 'white without detail' because of the information from the histogram .
Note the histogram 'mound' for the blacks is in the middle where 'average gray' normally sits ..... almost in the same place as the image at the top of the page for the 'white' manual !!!


This shows that for most metering systems the camera doesn't know the difference between black and white , there are so many variations in lighting intensity something "white in bad light" could look the same as something "black in good light" .... the meter goes for a 'safe average' and with most situations it works out ok as an average of all the colours but as you tend toward scenes with more black or more white [ basically ' darker or lighter than usual ' scenes ] you will need to either go manual and take control or dial in exposure compensation .


Now let's look at a more "real" situation . You want a picture of the writing on your exercise machine [ you may as well do something with it ! ] . You take this picture and the camera's meter doesn't know there is a lot of black in the image and so produces this image as a compromise .
Now if you look at the far right of the histogram you can tell right away that there is not much detail in the white writing because the histogram is pushing up against the right side - you are throwing away detail !

Have a look at this crop of the writing ....


That image was taken at 1/3 of a second and I changed manually to 1/6th of a second which gave me what I wanted . basically I "under-exposed" by one stop [ half the light ] and this pulled the histogram back enough for me to have detail in the white writing [ which was whiter than my manual and so is higher up on the histogram ] .
If you are shooting in an auto mode once again you will get the same effect by dialing in "-1" exposure compensation and then the camera will "under-expose" the image according to what the camera wants to do with it - but you know the image is supposed to look darker than average gray so you know better than the camera .


Look at the crop now ! ...

Metering mode comparisons for dark events


After a discussion on settings to use for a dance shoot I decided to put my theory to test - when things are moving quickly I like to use matrix metering dialed in at -2 [ for the black background ] . I set up ''Stinky'' with a black background and a 'spotlight' shining on him from the top/front .
I started off with spot metering in the centre of his face . Many people use spot metering in situations like this with good results . However the type of dances I've been photographing have been fast moving at times with rapidly changing light along with the fact that I often shoot wide shots as well which can make spot metering difficult under these conditions .
I'm not telling anyone what type of metering they should use , just showing my tests and recording my observations on the subject - draw your own conclusions . Remember these are all taken with the D40 so spot and centre weighted should be the same as any other camera while matrix might be a slightly different 'program' to other models .

First the spot metering centre focus point on his nose [ keep in mind that often people who spot meter off human skin add 0.7 stops of exposure since human skin is seldom 18% gray ]


It maintains an accurate reading as I move back which would make it a good choice for subjects that aren't leaping around like crazy with lights going bright and dim the whole time ....


But it just starts to 'lose it' when we go wide .


Now the centre weighted metering shots . centre weighted metering is more like a calculator than a computer program . You can work out mathematically what it is going to do with a set amount of light at a certain subject size - no surprises like with matrix metering !


If the subject fills a large percentage of the centre of the frame the metering will do a good job .

As you zoom/move back though , and more darkness around the subject fills the frame the metering thinks the lighting has got dimmer and adds exposure ...


and adds more as you go further back ....


and even more as the subject gets very small in the frame ....


very predictable and ''reliably so'' if you are going to use a long lens with the frame filled with the subject most of the time .

Now we get to matrix metering
There's good news and bad news . The bad news is that it is very negative , it doesn't 'see the light' , rather it 'sees the darkness ' and tries to brighten it . The good news is that it is rather consistent with its negativity which just means making one compensation adjustment .


All I can say is that "yikes!" it has blown the highlights but with a total of only 1 stop of difference between a large subject and a small subject against a dark background .

So I dialed in -2 in matrix metering and came up with these results .....


Notice that the results aren't exactly two stops less in each situation [ compared to the original results ] but take into account slight movement and the fact that there will be a lot of that on a dance stage and in my opinion I would say that it is a pretty reliable way of metering when things are moving quickly .
It almost seems like the solution to lots of different coloured objects running around against a dark background is ''meter for the black background at -2" and ignore the subjects . Ok this isn't exactly how matrix metering works but it's an easy way for me to remember it .
So there we have the results , no seriously blown highlights and a quick levels bump and we're away .
With the last dance I shot I only had to move the left [black] slider because the background was still one segment to the right since there was still a fair amount of light on it . The highlights were all ok and the interesting thing is that when I did that levels adjustment most of the noise went away and in the awful red lighting a lot of the red died down as well .

Exposure and noise - "exposing to the right"


Many people complain about their images having '' too much noise '' when in fact the problem is often related to bad exposure techniques . Have a look at the two images below , the one on the left is how the image looked to my eyes while the one on the right looks a bit brighter than the scene appeared to my eyes .
But if you look at the histograms the one on the left is actually underexposed though , strangely , the one on the right looks like it has more noise .
This is because the background should look almost black but "over-exposing" the background by "exposing to the right " has made it look gray and "noisy" .
This is not really a problem because we have a lot of information to work with and it's easier to make the gray area black than it is to make a black area gray .

To add to the explanation , these pictures were taken at up to iso 3200 so we should expect to see the worst noise possible from the D90 .

The picture on the left is what looked right to me after dialing in -1.3 compensation .
The picture on the right is how matrix metering determined the exposure to be correct and it was actually right .

The histogram for the right image is touching the right hand side as it should be .
You can see the one on the left has a lot less information - even though the picture looks 'correct' .


Now we open the images in photoshop and adjust the levels . For the first image I had to drag the right slider to the left to brighten the image - the resulting noise can be seen in the crop below . This is what happens when you under-expose an image and try to fix it when there is not enough information captured in the first place .


Now we take the second image - it is already bright enough where it needs to be , it is just the dark areas that need to be made darker . With a difference of 1.3 stops we have more than twice the information , in the form of light gathered , available for editing .
What is important is that we don't need to amplify the light areas , we just want to suppress the information in the dark areas and make it look black - this results in noise getting wiped away rather than being created by the program trying to make something of nothing .


When we look at the resulting crop , even though it is not pretty [ well it is iso 3200 ! ] , it looks a lot better and has much better colours than the first image .


Here are the two crops side by side . Remembering that they are both at high iso from a Nikon D90 and the final images look very similar ...... one person could tell you the D90 does a pretty good iso 3200 while another could tell you it does an awful high iso image. {You know what is really interesting? The image with the most noise is actually at iso1800 - lower than the better looking image at iso3200!}
It all depends how well they are exposing the image in the first place - as with cars "Most problems are caused by the ' nut ' that holds the steering wheel "
In the same way I could actually generate a lot of noise at iso 200 by under-exposing an image and then brightening it later in photoshop .


Just as a re-cap , the images I ended up with looked the same after editing - from a distance . The one on the left  though was "nice from far but far from nice " while the one on the right was much better when viewed up close . Here they are together after editing :
They don't look 100% the same but could with some fine tweaking ........


 Look at the colour of their eyes , beak and feet again . Depending on personal preferences I could make the one on the right look exactly like the one on the left with more editing and it would have less noise because I started with more than double the information . I could also make the one on the left look like the one on the right but the noise would get worse and the colours would still be ugly !
Don't let the lcd display on the back of the camera be your guide - watch the histogram . 

1.) Making the shadows as dark as you want to see them and disregarding the histogram is a recipe for disaster because that will mean you have to brighten the light areas later - you will have to amplify the available information because you never captured enough of it in the first place .
{ cranking up the radio when you have a weak signal results in 'hissing' /noise}.


2.) Exposing for the bright areas however , means that you have all the information that you need and you can actually throw away information in the areas you want dark - essentially killing the noise by turning it all into one large black area without having to sacrifice any of the information in the light areas !


1.) You can't recover information you haven't captured in the first place .

2.) If you capture the right amount of information you can throw some away where you don't want it without any adverse effects to the light areas .


Update : What not to do !
Exposing to the right does not mean pushing the histogram off the right hand side . Rather it means adjusting exposure to get the brighter parts of your image correctly exposed without having to increase brightness later -
Remember too that if you overdo it you can't recover totally blown highlight detail . I recently took some pictures of cloud formations and overdid the added exposure a bit much . This was the 'good' shot . note the histogram bumping up against the side with only a little blown highlights but good detail in the rest of the shot . Realistically this shot was already correctly exposed with only a slight amount of detail lost in the cloud .


This is the overdone shot - two stops more than the previous image - better colours but blown highlights - beyond recovery .... you can tell from the spike on the right hand side of the histogram .
Don't push the histogram off the right hand side unless it is maybe something like the sun which is impossible to include with detail or a very bright part of the scene that is not part of the subject and perhaps it can't be properly exposed without badly under-exposing the rest of the image .

Side by side .....


Now we edit them . The first one : I pulled the left slider across to the right to darken the shadow details ....


And on the second one I did the same thing .... the colours are richer but the details are blown - something in-between the two would have been good .


And side by side ..... you can see the potential for better colours with the brighter exposure  but if you overdo it you lose detail in the highlights .


So remember to watch your histograms and ''expose to the right '' when possible but don't overdo it either !


-->

Metering modes .

My test subject : I've chosen extremes , black and white , to exaggerate the differences .


Spot metering :

Exposure is calculated entirely from the centre 2.5 % of the frame . With some cameras it can be set to meter off a chosen focus point.
It will try to make that small area an average gray regardless of whether it is white or black or anything in-between so you will have to be ready to dial in exposure compensation depending on the subject .

spot metering on white tries to make the white surface an average gray ......

Moving that spot onto a black surface results in a huge difference in exposure as it tries to make the black surface an average gray ....


Centre weighted metering :

The centre of the frame gets 75% priority , the rest of the frame contributes 25% toward the final exposure .
This means that the centre of the frame has 3 times the effect on the final exposure as the rest of the frame . If the centre of the frame changes drastically the exposure changes drastically but if the outside of the frame changes drastically it only has 1/3 of the effect as when the centre changed .

For the maths geeks we could say :
" Exposure = [outside of frame + 3Xcentre of frame ]/4 " = "average gray"


Here we can see that centre weighted metering finds a reasonable average in a high contrast scene and changes only slightly as we move from side to side .....


Once I move right across to the black surface it responds like spot metering where it tries to make the black an average gray because now the entire centre of the frame is black - it has blown the whites on the side . Spot metering only required a slight movement either side for such a drastic change while centre weighted metering gradually changes .


And the same can be said for moving till the centre is only on the white surface , it tries to make the whites an average gray and all detail is lost in the blacks and as mentioned before , this happened gradually [ with regard to moving to the side ] until eventually the whole centre was on one colour ........ it required a larger area than spot metering uses to have this effect .


Matrix metering:

Matrix or ''pattern'' metering is a bit more complicated - it's a computer program that tries to work out what the subject is for you and will try to make that an average gray . It changes slightly [ sometimes drastically ! ] with each new camera model - and between brands of course .
It varies like the difference between xp and vista so we can't make any definite statements about matrix/pattern metering for all cameras .
With many of the newer models from Nikon I can state that they tend to meter strongly toward the focus points so simply selecting a different focus point for exactly the same scene can cause up to two stops difference in exposure !


Now look at these images carefully before deciding which metering mode you ' trust ' .
These were taken with a Nikon D90 , my D40 behaves very much the same but other models and brands might behave very differently . This is what Matrix metering did with the scene .


Then I moved the active focus point onto the black surface , I use "dynamic auto-focus" which allows me to select the main focus point while it uses the others to keep an eye on the subject and help with maintaining the auto-focus .... I shifted the active focus point across to the left .


Then I shifted the active focus point to the right which caused a big change in the metering .
You could say that I have moved the camera a bit but it's almost like it spot metered for the active focus point which is not necessarily what it will always do - you can't guarantee it will be consistent with a computer program .


Here's a real world example . The same scene , taken using a tripod , and all I've done is move the active focus point ! ....

Focus point on the left ....


focus point on the right ....


So which metering mode should you use ? You can use any one of them and never get perfect results in every situation .
Just remember that if matrix/pattern metering does a perfect job for you now - it doesn't mean the next model released will do the same so it would make sense to first get accustomed to using centre weighted and spot metering before seeing how well matrix/pattern metering works on your particular camera .


.