Flash : Going manual .

The first time I thought about going manual I had my camera in auto mode - I looked in the viewfinder and did a 360 degree turn and watched the meter changing rapidly as the scene changed ... I wondered how anyone could ever reach the stage where they could change the settings that quickly .
I eventually realized that nobody needs to change settings that fast , the meter is getting confused by small changes in a scene that has the same lighting in it and essentially could be photographed at the same settings .
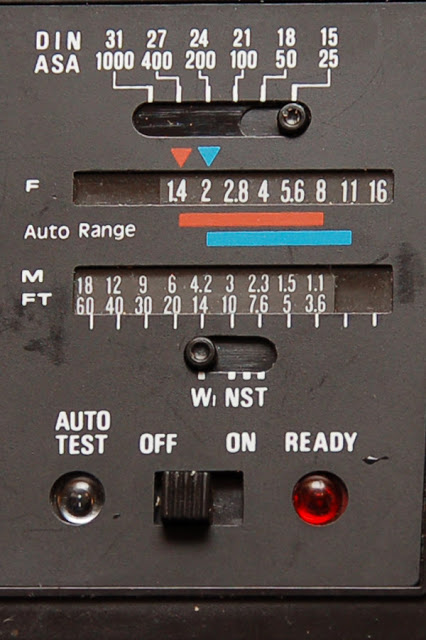
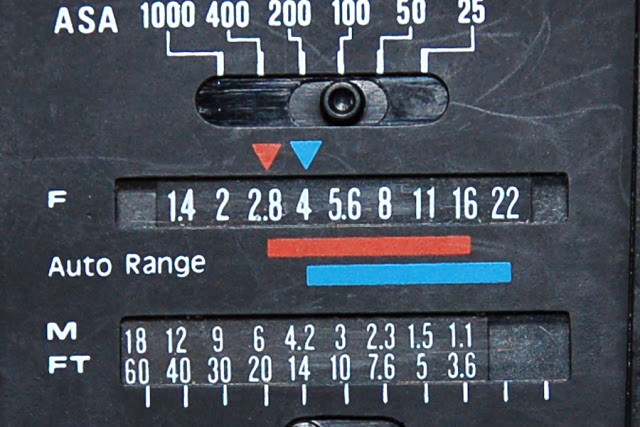
With flash , things get a little more complicated because you are working with two exposures , one for the ambient in the background [ where flash is having no effect ]  and one for the flash on the subject - along with the fact that the subject will contain a measure of the ambient as well as the light from the flash  .
Add to this the fact that flash is greatly affected by distance from the subject and the inverse square law .
This is why people who shoot manual with the camera often still use automatic flash .


But it is still worth doing some tests with manual mode and manual flash to gain a greater understanding of the principles involved  . With the following images the flash was in manual mode at 1/16th power the whole time .


To learn about shooting in manual it still helps to see what settings the camera would choose - turn off auto-iso , put the camera in manual and adjust the settings until the meter is zeroed .


Take a picture at those settings ....


There's not much detail in the clouds at those settings - you don't have to obey the meter , different metering modes would choose different settings and in this case matrix metering chose settings that over-exposed the background . It got us close enough to decide what we want to do , to get more detail in the clouds in the background I dialed in 1/200th which effectively let in half as much light as 1/100th thereby darkening the background .


Now the ambient light is where we want it we turn on the flash which was kept at 1/16th power the whole time to simplify matters .


The subject looks a little too bright now . There are two things that affect flash , Aperture and iso .
Changing aperture determines how much light is let in through the lens - this affects ambient light and flash ...


So if we change from F6.3 to F9 we darken the ambient [background lighting] and the affect of the flash in the image .


Now the subject isn't so blown out but the background has also gotten a little dark


If we want the background to get brighter , without blowing out the subject we can slow down the shutter speed again - we can go back to 1/100th sec and effectively make the ambient twice as bright again .


And there we have a brighter background


The background would look exactly the same if I had simply changed the iso to 400 instead of slowing down the shutter speed - but increasing the iso also affects the flash and we would still have a blown out subject that way ....


Also keep in mind that there is some ambient on the subject as well . As we slow down the shutter speed the flash is not affected but we can see the ambient on the subject having a greater effect as the light wrapping around it shows to a greater degree ...... 1/50th lets in twice as much of the ambient light again without affecting the flash which has happened in 1/5000th sec already ....


1/25th let's in twice as much ambient as 1/50th again - without affecting the flash on the subject .


And 1/13th doubles that again - we see more of the ambient wrapping around the subject but the part that is lit mainly by the flash hasn't changed .


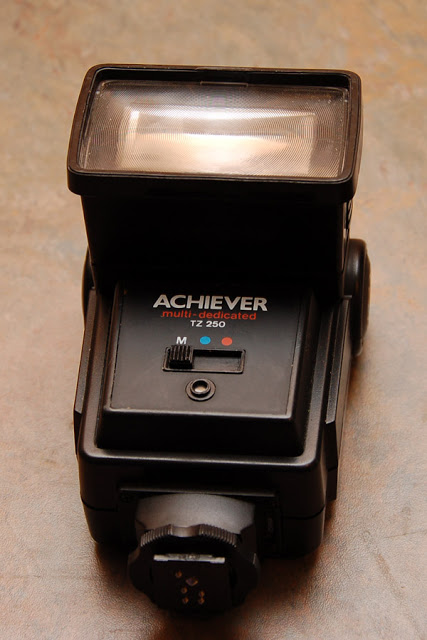
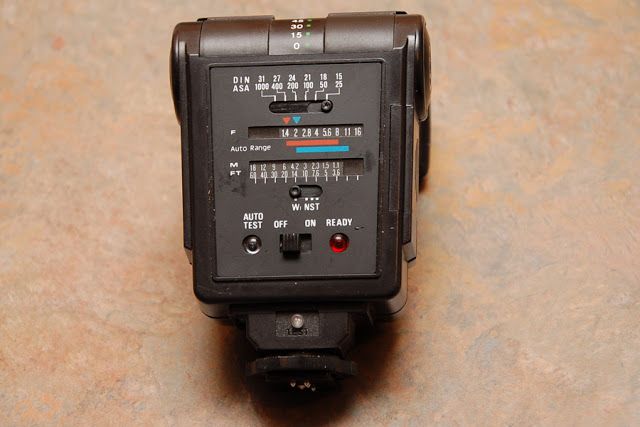
If you are using an older flash that doesn't speak the same language as the newer cameras just keep in mind the fact that the camera may not know there is a flash attached and will not limit your shutter speed to the maximum synch speed .
So what will happen if you exceed the maximum synch speed ? [ See auto-fp flash ] .
Try taking a picture at something like 1/400th sec ....


Since it is a focal plane shutter the movement of the shutter starts to get in the way of the flash at higher speeds - the flash still fires at about 1/5000th sec but the shutter is moving across the frame as a large slit at this speed and is never open across the whole frame at once regardless of how fast the flash fires .....


Increase the speed even more ....


And at 1/800th the slit that slides across the frame is getting smaller creating a larger shadow area where the flash is having no effect ... where there is flash though it is as bright as normal at those settings . At these speeds the flash itself is not affected by the shutter speed - it is now a mechanical problem where the shutter movement is conflicting with the flash . The D90 synch speed is limited to 1/200th sec .


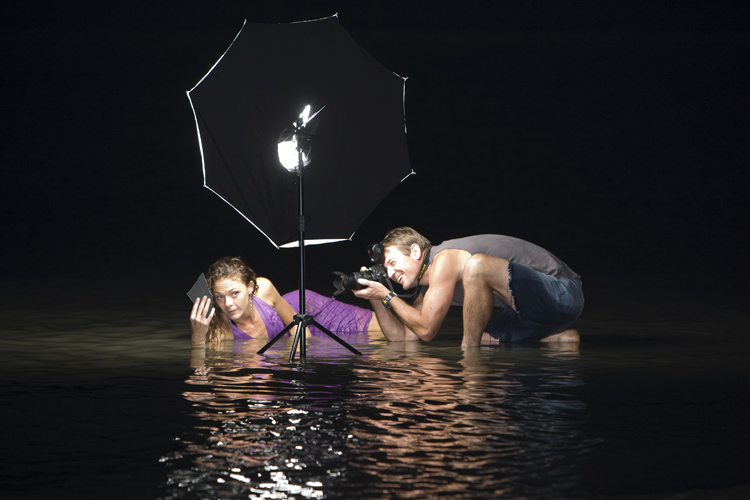
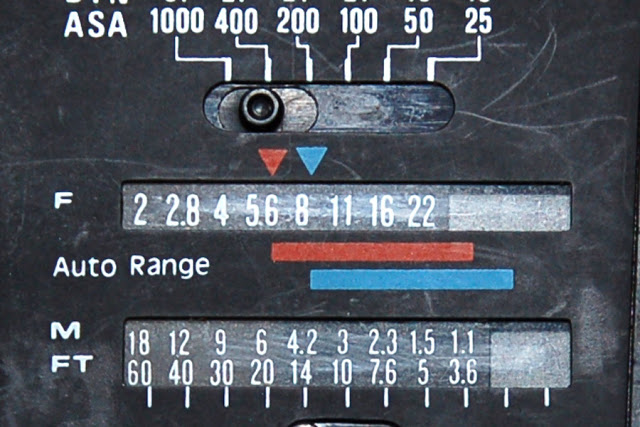
When you are using bounce flash with a ceiling at a constant height manual mode is reasonably reliable because the distance the light travels is relatively consistent but when using direct flash outdoors where there is nothing to bounce off it gets a little complicated .
If you double your distance from the subject the flash on the subject drops to 1/4 of what it was because it is spreading over 4 times the area ..... if the subject is 1.4142 X the distance then you will need twice the flash power .... if you are happy with doing those calculations then use manual flash outdoors but quite honestly I'll stick with auto flash when conditions are changing  rapidly . 


RTC - syndrome : "Resistance To Change"

"RTC- syndrome = Resistance To Change .... "Artsy syndrome" for short "
People are by nature resistant to change  . If you suggest something new people will be busy thinking of how they can contradict your statement before you finish speaking " It'll never work ...." . That's what happened when I told my workmates that I was going to invent a ''bilge pump powered longline fishing kontiki " ..... it's human nature and it happens whenever something new is introduced in photography as well .
When the Nikon D90 was first released people were saying "We don't need video in a DSLR" , today people are saying " Is the video quality in this camera as good as in the other model ? " - not necessarily the same people but I'll bet a reasonable percentage of the 'nay-sayers' have accepted it now .

That's a pattern that has probably repeated itself with every new introduction in photography .
Possibly from the time they introduced mechanical control of shutter speed  as opposed to people opening and closing the lens cap manually . Some even opposed auto-focus .... " It's not natural , all this new technology doing what we should be doing manually !" .... now people judge a camera by the speed of  its auto-focus . Auto modes , pattern metering , program mode ...... then digital came out - how many people "swore blind they'd never go digital " because all they were ever used to was film !
People initially oppose change and then once it is  'no longer change ' but 'normal' they embrace it and set their standards by it . 
Being resistant to change is another way of being 'narrow minded' - speaking against something without even thinking properly about it .

Unfortunately it gets worse with time .
"They don't play music any more like they did in my day " ...... sound familiar ? How is it that people's tastes change so much over time ? They don't ! Memory is  affected by "adrenalin" and "emotion" and when the human body is undergoing the changes of ''their generation " they are more affected by adrenalin and emotion than in later years so anything from ''their time'' [ music , inventions etc. ] is the best ! Anything after that is '' a little over the top for my taste '' because they have ''mellowed out'' and are less affected by adrenalin and emotion .... then their children go through the stage where ''their time'' is the best ever with the best music .... and the pattern repeats itself  .


It's a bit like the theory of relativity  ..... everything is relative to the observer - someone is walking at 5 km/hr - but they're on a train traveling at 100km/hr . To them personally they are moving at 5 km/hr but to an outside observer , if they are walking to the front of the train they are moving at 105 km/hr .
When I first got my drivers license and got my first car there were a lot of old 'fuddy duddies' on the road - those old fossils who couldn't seem to find the accelerator pedal and shouldn't even be allowed on the road !
There were only a few 'hooligans' who drove faster than I thought was 'reasonable' and also shouldn't be allowed on the road .
In the last 25 years things seem to have evened out a bit - there are slightly more hooligans and surprisingly less 'old fuddy duddies' than before - maybe people have learned a bit more common sense in this time ?
But I imagine that in another 25 years there will be tons of hooligans on the road ...! to me that is :(
As emotion and adrenalin subsides RTC - syndrome becomes more prevalent . new inventions start to become 'over the top' and totally unnecessary . If you grew up with manual flash , you eventually accepted "A" mode thyristor controlled flash , you eventually understood and accepted " TTL flash " but now TTL-BL or E-TTLII flash is a getting a bit 'out of hand' and ' unnecessary ' , it's  a little 'over the top ' having a flash system that also calculates the distance of the subject and what you have done with the ambient exposure in its output - we've been used to doing that for years and this is taking things a little too far now .... should you still be driving a car ??? 


Whether you're at the stage where there are only one or two hooligans on the road [normal RTC- syndrome] or are at the stage where everyone on the road is a hooligan [advanced RTC- syndrome] give a thought to your reaction the next time something new is introduced and ask yourself whether you have thought out your objections or are letting human nature get in the way of reasonableness .  
Technology is moving faster than ever so RTC-syndrome is affecting shorter 'generations' of people ..... try to keep up :) .


.

Using an older flash


With today's electronic cameras we have to be careful about fitting older flashes to a camera .
The most important thing to check with an older flash that you intend using is the " trigger voltage" . There is a list of trigger voltages on this site   as a general guide but always check for yourself .
Many of today's compact cameras can't handle more than around 6 volts - check what the manual says !
Then check the trigger voltage of the flash you want to use and decide for yourself .
The better DSLR's can handle up to 250 volts but you decide for yourself if you are prepared to take the risk of putting an old piece of 'electronics' on your expensive camera .


So you've checked the manual to see what your camera can handle , now look up the trigger voltage of the old flash on the site I mentioned at the beginning and then measure it yourself to be sure . 
Have a look at this old flash I received today - I thought I may as well get some pictures before I dissect it .


There's a reason why the 'test' button is right at the base of the flash - it's easier to fit there because the wires it joins together go right to the base of the flash as well . This is a wiring 'schematic' showing what the wires inside look like , they go to that button which is a switch that joins that pin in the centre to a  not too easily seen earth contact on the side .
These are the contacts you need to join manually for stop motion photography .


These are the two important contacts , you are probably better off covering the other contacts with a piece of tape or something because the camera may not like the flash talking a strange language to it and may refuse to fire if those pins confuse it with their "ancient dialect " . You can also buy a 'safe synch' adapter if you don't want to bother with checking voltages - they supposedly protect your camera from any voltage an old flash can put out .

So put your multi-meter on the 200-500 volts scale just in case [ I've measured these voltages at up to 220 volts previously , try putting a 12 volt light bulb in a 240 volt socket to see what could happen if you put the wrong flash on a compact that is made to handle 6 volts ! ] - put the leads on the centre pin of the hotshoe and the hard to reach contact on the side of the hotshoe and see how many volts it registers [with batteries in the flash , and the flash turned on , and the 'ready light' lit of course] .


In this particular case the meter showed a negative reading of "-8" volts . The earth pin is in the centre of this flash and the positive contact on the side - curious .


So 8 volts is pretty safe in my books - but the negative voltage ? For that reason I would test it on my old D50 before trying it on the D90 .


Now we look at the controls ...... It looks like this flash has many inputs but we eventually find out that if it isn't going to work in auto mode via the other communication pins at the base of the flash ... there is only in fact one 'electronic' control - the on-off button !
Looking at the bottom "W NST" simply refers to whether you have the flash head zoomed to any of those positions , moving it to one of them will simply slide a distance scale to tell you what working distance you have - minimum and maximum . The minimum distance refers to the closest you can get without over-exposing since there is also a limit to how weak a flash can fire !  The red and blue stripes would probably be your reference , depending what mode you have chosen . 


And on the front  you can choose between "M" for manual and "blue" mode , or "red" mode - two supposedly semi auto modes .


The crazy thing is that the switch on the front is ''mechanical" in it's operation - there is nothing electronic about it . In the hole is a thyristor control that measures the light reflecting back from the subject when the flash fires and stops the flash when it measures a certain amount of light . The three settings are simply different ''filters'' that move in front of this window .
In the 'blue mode' there is a hazy piece of plastic that moves in front of the sensor and simply makes it harder for the thyristor to 'see' the light coming back ... twice as hard actually as we will see from the settings .
So because only half the light reaches the sensor in this mode the flash fires twice as powerful as 'red mode' meaning you can use a smaller aperture . if you look at the two arrows on the selection scale they are one stop apart = F1.4 in red mode or F2 in blue mode .

Here's 'red mode ' , basically a clear window that allows the sensor to 'see' the light better and switch off sooner ..... talk about amazing technology !


What of manual mode ? ...... that's like putting a lens cap on , moving the slider to "M" simply slides a piece of black plastic across the 'eye' ..... the sensor doesn't 'see' any light from the flash and so fires at full power each time - it is still actually in auto mode but since it can't get a reading it will naturally fire at full power .


Now the other slider on the back of the flash - this also shows that the flash is actually set for one particular output based on the thyristor reading - the "hazy filter" in the red and blue modes simply affects the sensor reading to give the appearance of two power levels . The settings on the back are simply different combination's of each mode for exactly the same output .

 Let's start with iso 100 ,  red mode gives us F2.8 and blue mode gives us F4 .


Look at the setting for iso 400 : Red mode F5.6 , blue mode F8
 

If we were at iso 100 in red mode for example we would have to shoot at f2.8 to get enough light from the flash at the basic output it is set to , to achieve a correct exposure . 
By moving to iso 400 and effectively amplifying all light entering the lens 4X we can go to a smaller aperture - two stops lower , to f5.6 . Due to the inverse square law and the fact that aperture is a ratio of diameter  F5.6 lets in 1/4 of the light as f2.8 ....... a factor of 4 as with the change from iso 100-400 . They cancel each other out - multiply the light by 4 with iso and divide it by 4 with aperture .


So none of those sliders change anything in the flash - they just tell us what settings to use to get the right exposure for what the flash is designed to put out . Of course we don't have to obey the flash settings - if the results are consistently wrong , too bright for example , we could use a lower iso or smaller aperture than suggested to achieve the results we prefer .


On another note something else to check with an older flash is the battery compartment - open the battery compartment and check that there is no corrosion from batteries that may have been leaking in the past .
If there is any corrosion a flat bladed screwdriver can be used to clean it off .


This flash was good inside considering its age . I won't be using it on my camera , I have some 'experiments' to perform on it and just thought I'd share what I know with those who intend using an older flash on their camera .... good luck !


The luge battle

Last week coming through Rotorua I visited a friend and used my Goprp helemt cam to get a video of us battling against each other on the "luge"


Photography tips

I'm going to start this off with what I can remember so far - which isn't much at the moment but I'll update it as time progresses .Please feel free to add to this list of tips regarding photography - most of which I have heard on the forums . Either contact me or post it in the comments section below .


1.) "Just because you have the tools doesn't mean you have to use them "
Someone told me this after I bought a new flash and started trying to use it on every occasion to 'enhance' images . I had used it with someone standing next to a large window with really good natural light coming from the side..... and totally destroyed the natural atmosphere of the image .
If you have some gear that you enjoy using , or are trying to learn to use don't lose sight of the fact that an image may actually look better without it .


2.) "First find the light , then find the background "
Don't go looking for a nice background then try to get the light right - first find decent lighting , then find the best background for it .


3.) "Fill the frame " 
know what to include in the image and what to exclude - simplify the image . Also keep in mind though , that depending on how you will print the image it is good to have some extra space around your 'frame' to allow for cropping or the possibility of the sides of the image being cut off at different printing ratios .
This is particularly important with group shots of people , if they are touching the sides of the frame they may all fit in if the picture is the same aspect ratio of your camera but doing a "8X10" of the image might chop of a person on either side while an "8X12" would get them all in [ with a 3:2 aspect ratio ] " Always scan the edges of the frame before taking the picture " [ if time allows of course :) ]
Get as close to your subject as possible (of course, within reason). I shoot a lot of sportscars (and other stuff) and I always notice photographers shooting from halfway up the seating area. Maybe they are using a zoom lens with 200 mm or 300 mm at the long end but why not move down the hill and get right up against the fence*, then frame and shoot.

I feel the less distance between the shooter and the subject the more clarity in the image. And using a slight shorter focal length may increase your maximum aperture, which could be a good thing. [ "Peter" planetnikon.com ]


4.) " The camera doesn't 'see' the same way your brain does " .
Learn to look at things the way your camera does .
Have a look at "how the brain sees" .


5.) "If you see something you think is interesting or like - take a picture of it. If you walk away and decide to come back, it may not be there."
Example: I drove by a beautiful huge sycamore tree for years. It must have been over 100 years old. Perfectly formed and stood by itself. I saw it in every season, in every light and always though what a beautiful seasonal picture series it would make. They cut it down. No images, except those in my mind. 
["midocr" - nikoncafe ]


6.) "Don't be satisfied with your first shot." 
Take pictures of the same scene/object/person/etc. in landscape and portrait modes, and from different angles, locations heights etc.
Bracket exposures, focus, dof, and try different lenses. 

["Palouse" Nikoncafe ]

7.) "F8 and be there ! " 
 I think this is old saying comes from newspaper reporters . Essentially it is about the idea of choosing settings that will get all the detail you need and actually being there to capture it as opposed to stressing about ideal settings for a situation with the chance of missing the action .
If you have time then by all means choose the ideal settings but if something important is happening [ eg: at a wedding ] then the most important task at hand is to capture the moment which won't happen again  ..... you could be fiddling with settings and stressing about image quality and miss the shot because time did not allow for it . 


8.) "Check your settings when you pull the camera out of the bag. Or always reset your settings to some base level after you're done."
If I had a dime for every time I pulled my camera out of the bag and shot 30 photos at ISO 800 because that's what it was last night, I'd be shooting with a D3x by now.[ "free range otter" nikoncafe ] 
Before shooting, always remember to check for "W.I.M.P." It stands for "White Balance, ISO, Metering, Priority." This is your pre-shoot checklist [ JGI nikoncafe ]. 

9.) "Don't let the gear get in the way of taking good photos " ["twistedlogic" Nikoncafe]
Otherwise know as " A bad workman blames his tools " . Since today's entry level cameras are better than the first professional digital cameras in regard to image quality it is hard to see how people can still think that really good images are due to the camera gear being used . Although there are some images that require expensive lenses there are still many good images that can be achieved with the right knowledge , and just about any camera .


10. ) " Get it right in-camera "
Never say "oh I'll just fix it in Photoshop" - compose the shot the way it looks in your minds eye and then expose it
  

11.) "Never try anything new at an important shoot "
Photography is like hiking in the mountains - you make sure that your equipment works before you attempt a hike . Wearing new boots on a long hike can only guarantee blisters . A new flash or lens could still be faulty right from the factory .
You could slip in that brand new memory card only to find it is not compatible with your camera - or your Nikon D1 doesn't recognize 32 Gig cards . 

12 .) "Beware of 'bulls-eye shooting' " 
It is a common and easy mistake to make - lining the subject up in the centre focus point and firing away , this often leads to pictures with a large gap above the person's head  , or 'uncomfortable space' around the object you may be photographing . Keep the 'rule of thirds' in mind , perhaps placing your subject to the side of the frame rather . With full-body shots of  people though it is often better to have twice as much space above their heads as below their feet - but you still don't centralize their head in the middle of the picture that way .
These are just guidelines as opposed to 'laws' but usually work better than the subject right in the centre of the frame all the time . Sometimes central composition will work better - for example maybe you are taking a picture of a 'bulls-eye' :) and that is the effect you want to show .


13.) " People 'read' photographs " .
This is a strange one . If people read from left to right that's the way the look at a photograph . often a picture will look more 'normal' if it is framed on the right . For example " A bride walking up to the groom leaning up against a tree " - if the tree is on the right then the picture seems to make more sense but if it is on the left it is " A tree , with the groom leaning up against it and the bride walking towards him " ..... which doesn't quite sound normal .
If you were to show people the same image flipped over and ask which one they think has been flipped most of them will pick the one that is framed on the left because to them that one will not feel 'normal' - depending on whether you read from left to right or from right to left .
Depending on what country you are in when you enter a photography competition it would pay to know which way the judges read before deciding on what composition to use because what looks normal to you may look backwards to them . 

14.) "Fishing lures are designed to catch fishermen "
Ok , I made that one up but essentially what I am trying to say is that all those fancy attachments for your flash that keep being invented are primarily designed to make money for the person selling them rather than improve your photography . You can do a lot with one flash either off camera or used on-camera as bounce flash .
Many of those accessories will end up collecting dust once you realize how useless they actually are or how insignificant the difference in the results is .

15.) " Digital costs nothing extra to take more photos " 
We have two lines of thought on this one .....
a.) Don't be shy to experiment , go out and take pictures , try different settings - it's no costing you any more to take twice as many pictures ..... BUT
b.) When it matters , shoot as if you are using expensive film - that way you will think harder about each shot rather than resorting to "Spray and pray" - taking hundreds of pictures in the hopes that a few will accidentally be good . 

16.) " Don't just 'take' good photos , 'make' good photos " .
The light won't always be good but you may still need to take a photo . Bring out the flash , the reflector/s ... whatever you can use to actually make it better . You can't always expect things to work out just right - sometimes you have to do more work for decent images . 

The " amateur wine connoisseurs " and photography .

There are many of them out there , they are the people that give a picture first place in a competition and nobody knows why . Everyone who looks at the picture thinks " I would have deleted that picture if I had taken it !?" . Meanwhile the person judging those pictures is usually trying to show that they understand the ''deeper meaning'' of the image regardless of whether it is actually appealing or not .

Why "Amateur wine connoisseurs " ? 
Because it reminds me of a story about this guy who always used to annoy everyone with his "knowledge" of decent wines . One day we swapped the contents of two bottles , we put cheap wine in a bottle with a fancy , 'expensive' label . We presented him with the bottle and after reading the label he held it up to the light and pointed out how he could now recognize the excellent colour of an expensive wine ..... we looked at each other sideways . Then he proceeded to pour a little into a glass and swirl it around before sniffing it and telling us how much better the aroma of a good quality wine is before sipping it and saying " You don't get taste like this from a cheap wine !" ..... we never had it in us to tell him what we had done though - you kind of feel sorry for people like that :( .


Now in the world of photography [ basically in any occupation ] you get "Amateur wine connoisseurs" .
People who have learned something that they feel is a little more than what the 'average' person knows and they are quite proud of themselves for understanding it to the point where they feel slightly superior to those who don't have this knowledge .

The "Amateur wine connoisseurs "[ " AWC's "] have often studied many famous photographers  to learn how to get "unique" images , rather ironically. Often the "AWC" who worships his hero photographers will go out of his way to justify anything that doesn't look right to the average person in one of their images while trying to show their superiority in understanding this 'hidden meaning' by explaining exactly why the image is good and why the artist 'broke the rules' and how they personally understand that 'deeper meaning' that couldn't possibly be wrong ..... because of the "label on the bottle" [ the artists name ] .

Those same people would probably give a beginner photographer who produced the same image a list of reasons why the same image is wrong but because they find out that an image was taken by one of their hero's they will fiercely defend it from any criticism and ridicule anyone who doesn't like the image .

Seriously , a picture is supposed to say a thousand words so if someone has to actually explain each aspect of a picture then that picture has failed in what it was supposed to convey .....
Get real , think for yourselves , those hero's you worship may be talented people who have made a name for themselves but they are still only human - they make mistakes as well and perhaps as they progress they may look back at some of their images from the 'early days' and wish they had done them differently ..... while the AWC will continue to believe for all eternity that that is how a 'unique' image should look ... because of the 'fancy label on the bottle '.

In summary I'll mention that there are artists I admire for their work, many of them produce good work consistently , but I never judge an image by the name of the artist , I don't have any "hero's" , I only see them as 'stepping stones' to glean what you can from them before moving on - how do you make progress if you are limited to judgments made by other imperfect people ? You would only be limiting your potential to the percentage of what you can remember about others .
So learn to think for yourself , have an open mind , and beware of falling into the trap of becoming an "AWC" who judges by the label on the bottle  rather than by what " looks , smells and tastes right " !


25 / 06 / 2010 - this was contributed by "JGI" of nikoncafe :
In another forum I used to frequent, there's this know-it-all guy who swears up and down that he can hear the "audio signature" of a McIntosh tube amplifier. So they arranged a meet for him to "judge" another member's McIntosh setup. When they played some scores with high dynamic ranges, he praised the "warm fuzzy sound" that's emanating from the exotic components, and how the highs were so defined that he thought there were actual cymbals in the room. When the audition was over, they showed him what amp was actually being used... a cheap Aiwa receiver bought from Wal-Mart! The poor guy never posted again in that forum.


While discussing this article on the forums I also thought about the possibility that we could go totally in the opposite direction to great benefit . If we can make sure we don't become an "AWC" who pretends they recognize a "good" wine due to the label on the bottle perhaps we could become skillful enough to recognize a potentially good wine in a bottle with a cheap label ?  

We may be quick to point out the mistakes in a beginners photo but do we ever recognize the potential in the image that exists if their mistakes could be corrected as they learn more ? 
I suppose we could compare this to being able to recognize a wine that will be good once it 'matures' .


Quoted from Ed Sharpio of photocamel

"What is worse than a simple AWC is a IHW (Intransigent Hero Worshiper). This is a photographer who latches on to a a popular photographer/teacher and becomes not only a student but a disciple. This teacher becomes a god and anything that is done that contradicts or innocently strays from the ways of his or her Deity is bad, evil, sacrilege and unadulterated crap! Every judgment or critique that comes out of this person's head is based on his cultism or tribalism. These folks want to be clones of their teacher, however, they will never rise to the level of their teacher because they tend to follow him or her mechanically and don't realize the nuances where the real genius lies."

Tokina 11-16mm F2.8

I've had this lens for a week and after the first day it was already my favourite lens .
The fact that it is a constant F2.8 lens really adds to its 'likability' . The build quality is good and it feels well made - but time will tell , though Tokina does have a good reputation .I've owned the Sigma 10-20 mm lens and though I enjoyed using it I didn't like the softness and the strange distortion near the edges - straight lines don't have that normal constant curvature on them , they suddenly drop off near the ends .
Not so with the Tokina - for those of you who really worry about distortion I took two images of a wall at 11mm and 16mm .
The distortion is much more natural than with the Sigma 10-20mm .


There isn't much distortion at 16mm though with a lens like this most of the time you are at 11mm , and shooting things like landscapes where the distortion on the edges isn't such an issue anyway .


Here are a few images I've shot with this lens in the last week :
A shop in Raglan , New Zealand .


Bridal Veil falls near Raglan .


The Lookout near Raglan .


An old couch next to Lake Rotorua .


Statues at the lookout near Raglan


And an edited version ...


The good thing about a lens like this is that people don't even think it's possible that they may be in the picture when they see you pointing the lens to the side of where they are sitting .


As I mentioned this is my favourite lens and it may be a long time before it leaves my D90 :) .


Tonight I managed to wire up my module through a SSR to trigger a spark when I take a picture .... it is working up to 1/1400th sec !


Creating separation

Much of what I post is stuff I am slowly beginning to understand myself - not because I knew it all before .
So a lot of this will sound obvious to those who already know about it but hopefully others will find it useful .... as I record what I am learning in my "photography diary".


Sometimes people get confused as to what the subject of the picture really is - when it is obvious to you .
Quite often you yourself know what you were taking a picture of but somehow it doesn't look the same in the picture .... your brain had a different concept of what you saw as opposed to what the camera produced .
And often I have looked at a good picture and wished I had that kind of scene to photograph in - not realizing that it has been created by the right settings ..... settings that I usually allow my camera to choose for me .

So the trick is to produce an image where there is no doubt as to what the subject is ...  because it's really frustrating when they have to ask what the picture is of or complain about the 'subject' being in the way of the scene when it is 'the scene' !


I just went out to get some example pictures so don't expect too much ...... let's say you wanted a picture of a fence post - you walk up to the fence "click" and there it is ..... when people see it some of them might say " nice picture of a farm scene but that fence post is in the way " .... or " the cows aren't properly in focus " and then your face changes colour a few times as you explain that the subject IS the fence post !


Now the above image was taken with my D50 and the 85mm F1.8 lens at F16 which gives maximum depth of field - for that lens ...... let's try the same picture again at F1.8 ....
Now it's more likely to be recognized as a picture of a fence post !


Selecting the correct aperture and actually using depth of field to make the background out of focus helps to show that it isn't meant to be part of the image in the first place and starts to create a separation between the subject and the background .
We can go a step further .... literally , and move closer to the subject which creates even more separation
F16 still makes some of the background look like it could possibly be part of the scene but much less likely to be so ....


F1.8 removes all doubt as to what the subject is now that we are closer to the subject and have less depth of field ....


So depth of field is one way to make it more obvious what the subject is but you can't always use it !
Why not ?
Well what if you are taking pictures at a wedding , you have the bride as the main subject and perhaps the wedding location in the background as part of the scene - not the main subject but something we want to recognize in the final image as part of the memories of the day ..... we still need to have a good depth of field but show that the bride is the main subject .


I never had time to rustle up a bride so late in the weekend and had to stay with the fence post for now . I won't claim that the final image looks great - maybe as I get time I will be able to set up something decent but for the moment all I am trying to do so show the difference between different settings in exactly the same scene .
We have out 'bridal portrait' again at F16 , there's the "reception hall" in the background . [ the sun had just gone down and things are getting dark .... and cold !]


We may be stuck with this depth of field but we can change our other settings to darken the background ....I had the camera in manual and changed the shutter speed until the meter showed "-1.7"


And then add flash to lighten the subject ! .... now the pole , I mean 'bride' is as bright as originally but the background is darker creating separation between the two while still showing both in the final image .


Of course you can always combine the two ... have a shallow depth of field and darker background with flash added to the subject but I'm not going out in the cold again to set up that shot .... maybe another time ! 
For now though I'll throw in a sample from the pictures I did the other day while trying to work out the settings used in an image on a popular book  , basically it involved darkening the background and lighting the subject to create separation while still showing both but leaving no doubt as to what the subject was .....


25 May 2010

Tonight I managed to fry a solid state relay earthing it though a coil - I think the current was too much for it .
My hopes are still resting on this wireless flash kit which is now triggering another solid state relay .

 
That will have to do for tonight , maybe while I'm sleeping I'll dream up an answer to what I am going to switch with this relay , without destroying it , to ignite a mixture and give me a fireball to photograph !

I think I need to modify the spark gap a bit . Tonight I set up some 'almost' empty paint cans and shot them , with the sparking circuit leaning up against the can . I had the sound activated trigger connecting the sparking circuit through its relay and had to unplug the battery each time - I think the load is a bit much for that relay and it sticks a bit .
I shot with the D90 in high speed mode at iso 200 , F9 and 1/1000th sec and only got one real fireball out of the lot , none of the others ignited . Since it was raining I stood in the garage with the can just out of the shelter ....


I should have had a wider lens - I never realized it would creep along the floor .


Flash plus ambient .

In the beginners flash info post it was mentioned that the newer flash modes make automatic adjustments for how well the ambient lighting is exposed . 
When shooting indoors though , the general response of auto flash modes is to try to take over total exposure of the scene at any speeds below 1/60th sec . [ This depends on the model of camera and where you have set the lowest flash speed , also the newer cameras are starting to behave differently when auto-iso is turned on]  .

On to the 'tutorial' , I feel that people learn more by trying things themselves so it would be a good idea for all beginners to take a series of images indoors using flash at varying shutter speeds [ at one particular iso and aperture setting ] to see the difference it makes in the ambient lighting .


First set up a subject [ prettier than mine hopefully !] and take some images at different shutter speeds without flash .


Take note of the different colours of the light source[s] . In this image we have one green tinted light and one yellow tinted light adding to the scene .
I chose iso 800 with this large room to help the flash a bit , F5.6 let in enough light and gave enough depth of field for the situation .
As we increase the shutter speed obviously the lights get dimmer . 1/60th has fixed the 'blown out' aspect of the two lights while still retaining the colourful glow of the two different coloured light sources .


At 1/200th the room loses its glow and things start to look a little 'cold' ....


Now we turn on the flash , direct flash in this case [ for no particular reason ]....


So at 1/200th the flash lights up the room nicely but the ambient lighting doesn't look too healthy .


In the above picture the room is well enough lit but has lost the character of the yellow-cast light on the distant wall so we drop the shutter speed back to 1/60th and try again ....


Now the image has warmed up a bit , there is more of the yellow lighting on the far wall though the white light of the flash has slightly washed it out so we drop the shutter speed to 1/40th to allow more of the ambient to soak into the scene - changing the shutter speed makes no difference to the flash , it stays the same , only the ambient changes .


When taking pictures indoors there is less need to worry about the shutter speed going too low , within reason of course . Full power flash fires at about 1/700th second and as it gets weaker it fires faster , 1/16th power fires at about 1/10 000th second - this is what freezes the action and a little camera shake will only cause a slight blur in the ambient lighting only which is so weak in this situation that it is unlikely to be noticed in most images .
I have seen some good indoor shots taken hand-held at 1/6th second
and they look good because the flash is the main light source and freezes most of the motion .


Once again I will mention that it is best to set your camera up on a tripod [ to maintain the same scene ] and take a series of images , perhaps at the same settings I have chosen if you are unsure of your settings , and take note of the ambient lighting in the scene , with and without flash .
That is the best way to learn and understand what is going on in this situation before attempting it in a real life scene where you are under pressure . Since indoor lighting doesn't vary that much in different locations you will find that the settings won't vary much , besides intentional low-light settings like dance floors . 
Nikon SB800


22/May/2010

Tonight I had a few more failed attempts at modifying the circuit board to work with my wireless flash trigger .
I'm not exactly an electronics expert , just an 'Auto Electrician Hack' trying to make this work but once it does .... I can start triggering "fiery events" with it


Trigger failure

Tonight I managed to connect the high voltage trigger to the flash tube to an external wire and an earth wire which produced a 2mm spark . Unfortunately not enough to ignite the mixture .... yet :( 


settings for fire

Tonight I checked to see that the coil system would ignite white spirits [ benzine ] well enough and tried some different settings to find out what shutter speed I would need for decent flames .


Explosions ???

Tonight I put together another sound activated switch


and instead of wiring it up to a flash I wired it up to my other invention .... the sparking machine !


Now when there is a sound it triggers the coil which switches via a relay at around 20X per second and generates up to 25000 volts .
I took an old power cord and joined the wires to the output and modified the end of the cable to provide a controlled gap for the spark to jump across - probably around 10000 volts .
Now I need to work out how to fill a balloon with gas without letting too much escape , then I place it on top of the power cord , make a noise .... boom !


:D


.

How the brain "sees"

Many people wonder why we need to do things like HDR [ high dynamic range] to our pictures to make them look ''right'' .
As a side issue there are many overdone versions of HDR images which gives the technique a bad name but the main idea here is having an image that is easy to look at where the shadows and highlights both look the same way they would to the human eye .
Actually it is more like the way the image looks to the human brain because the brain processes the  information that enters your eyes much like the way the camera's built in computer processes images that fall on the sensor ..... except it can change the iso in different areas of the " brain sensor "- at the same time - in one image .
Why does this image look relaxing ?


The answer is in the question .....
"Relaxing" means not doing any work . The lighting is pretty even so your brain doesn't have to do any work when you look at it ! It just happened to be good lighting as the sun was going down between the clouds and the image needed no extra editing because everything looked right .... you don't often get that type of lighting !
But with some images there are very dark shadows and bright highlights that your brain has to process which is hard work , the opposite of relaxing - more so in real life than when looking at a screen .....
In the late afternoon when you have your back to the sun everything looks relaxing because the light is even and your brain doesn't have to do any processing ... it can just relax while you enjoy the scene .


When you turn and look to the side where there are a lot of shadows
it suddenly has to work harder so you can see detail in the shadow areas and sunlit areas .... not so relaxing ! 


This is even harder [easier?] to understand when you are taking pictures and the results don't look the same as it looked "to your eyes" .

The main thing to remember is that your brain is doing the 'seeing' , your eyes are just transmitting the image to your brain to process . Apparently our eyes can adjust aperture from about 1mm to 9mm and our eyes' 'shutter speed' is around 1/30th second - from what I have read - besides that all I really only know and care about is what I see when comparing images to what a scene looks like ... such as in this example ...

This is what the view looked like to me when I looked out the kitchen window today , this is two images combined .....


 But interestingly when I look away from the scene and blink I see something like this .....


This is because my brain was darkening the centre area and brightening the area around it so that I could see the two different scenes "correctly" .
What two scenes ? 
First there is the outside scene .... I had to set the shutter speed to 1/250th to capture all the detail my eye was seeing .


But it didn't look like that to me on the inside ? I had been sitting at the computer and the inside looked much brighter to me [ to my brain actually ] .
To get the inside looking as it did to my brain I had to drop the shutter speed to 1/5th ...... 50 X slower than 1/250th !


So what has happened to the outdoor scene now ? Well actually that is exactly how it should look in comparison to the inside of the room because it is 50X brighter than the light indoors .... but my brain won't accept that , it has decided that I can see both scenes as it has determined they should look and has adjusted two different areas of my "brain sensor" to accommodate this . Since the eye/brain is limited to about 1/30th second and it can only select one aperture for any one scene it has only one setting left that it can change ... iso .
That's why when I blinked I saw an image of the window , my brains sensor had modified the centre of the scene to darken it .... it had set the centre of the frame to 'iso 100' and the outer part of it to 'iso 5000' ,  which is why blinking showed an image of the bright window , my brain sensor had two different iso settings at once ! 
[ These are made up iso's by the way ;) ]


Because it was such a drastic difference it would take a while before the entire area of my 'brain sensor' was reset back to an even pattern .
This is why people do 'HDR' images , an advanced process of the quick-and-nasty combined image I did in the beginning to show how it looked to my 'brain' ....


On a side note if you are not into shooting multiple scenes with a tripod and editing them later you can fix the problem in one shot with a flash . I shot the same scene again a little later in the day but this time I exposed for the outside scene and used bounce flash off the ceiling to light the inside .... apart from the tacky light fall-off due to the angle I was at this is the way to expose for indoor scenes when you specifically want the outside to look 'right' as well .


After taking these shots I went for a walk in the hills on the farm , halfway up I took this shot  ..... this is how the shadow area looked to my eyes but the background is blown out


And this is how the background looked to my eyes ...notice we are back at that 1/250th that I ended up with inside the kitchen !


 So in this scene the sunlit area is 4X brighter than the shadow area according to how my brain sees it . If I had exposed the shadow area properly it may have been a lot more but my brain told me that since it was shadow area it should look a bit darker than the background [ this needs to be remembered when processing an HDR image for it to look natural ].
So what was lighting the shadow area so that it was brighter than the 1/5th of a second exposure inside my house ?
Well , when I turn around and take a picture I get this light source ....
It is getting its light from the white clouds and blue sky behind me .
This should also make it easier to understand why you need a 'shade' wb setting , a lot of the light in shade areas is blue light coming from the sky which needs to be canceled out by adding a yellow cast that cancels out the blue of the sky ... this is another aspect of how the brains sees ... it can make adjustments for colour casts that your camera actually shows accurately but that is a whole different topic :) .


Different views of images

Pictures don't have to be displayed 'the right way up' . Sometimes they can look better from another angle .
These pictures of rocks reflected in the evening light just seemed to look better when not displayed the right way up . It does have some people asking questions when they see it and assume it is the right way up  .


This one looked like  a baby dinosaur when shown sideways .


Don't be bound by the assumption that all images must be shown the right way up .